
My progress is/was being documented over on hackster.io but it's stalled a little in recent months (trying to nail down a little software sub-project, new baby, general life woes, too many projects/not enough time etc...)
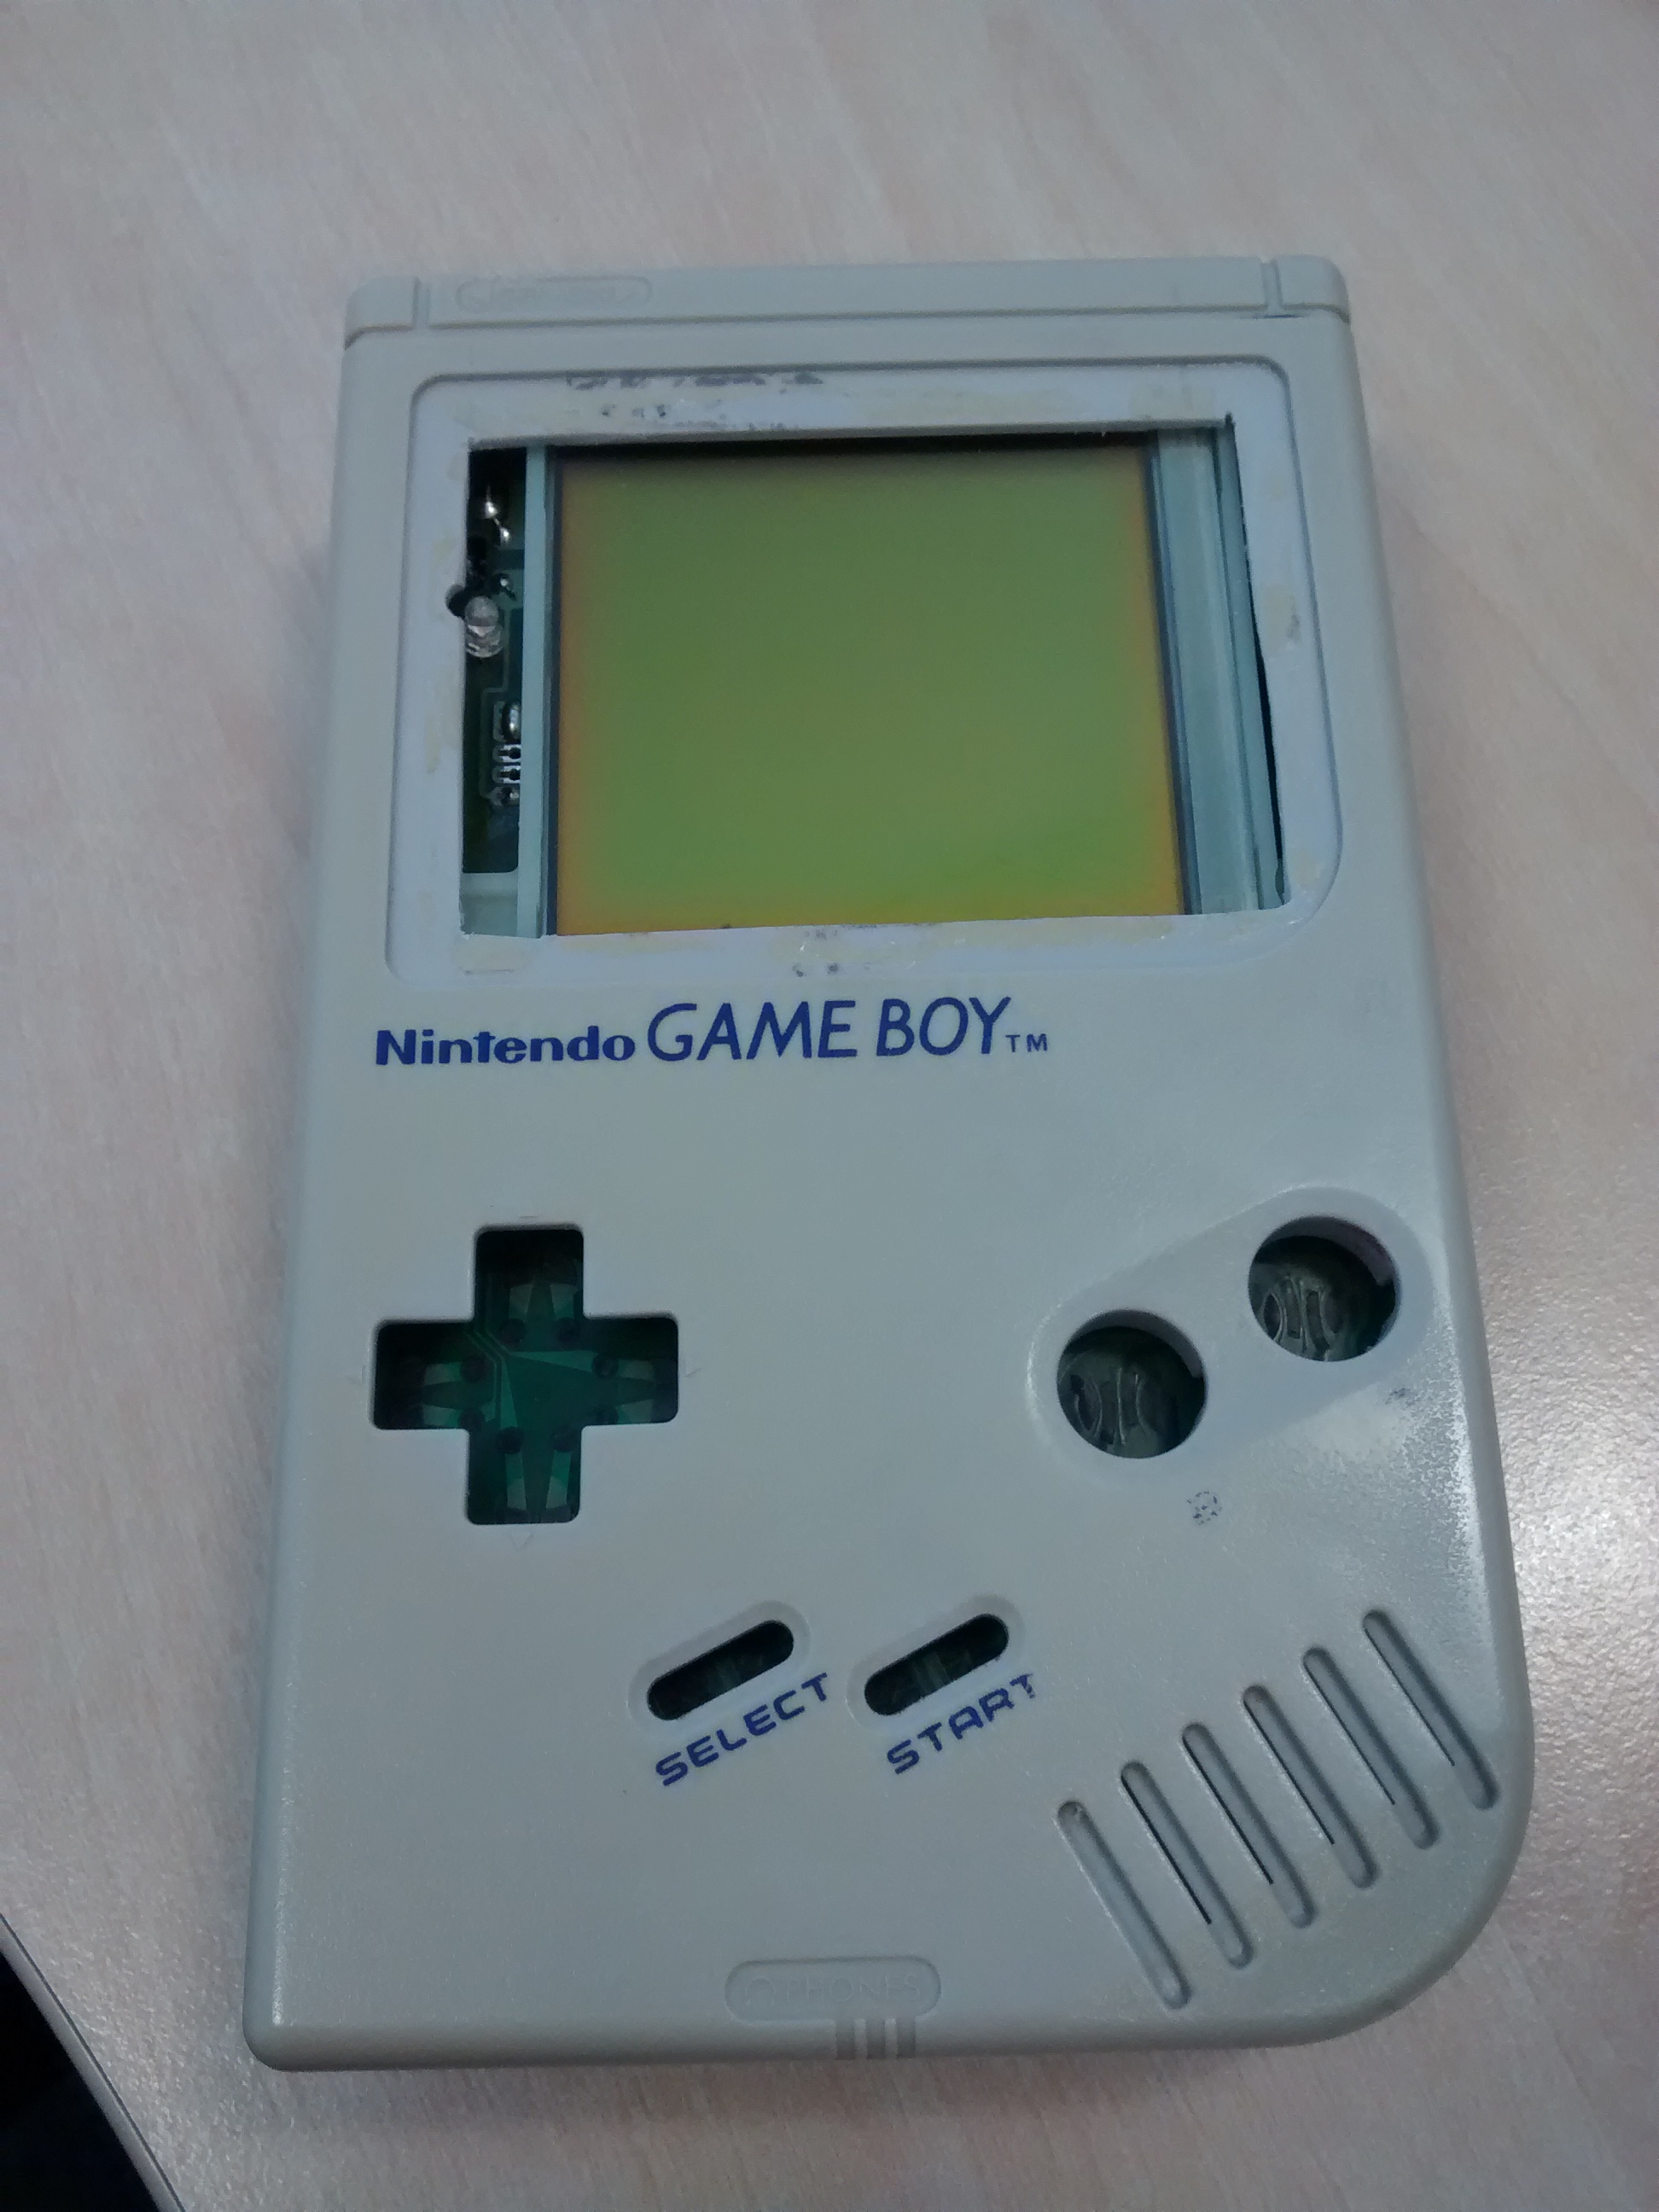
but the tl;dr version is that i started out planning on doing an adafruit PiGrrl last summer. ordered all the parts and was waiting for a chance to print out a case at my hackerspace ( SoMakeIt ) and in the meantime I came across a pair of broken DMG's so figured a real Gameboy would be better than a faux one
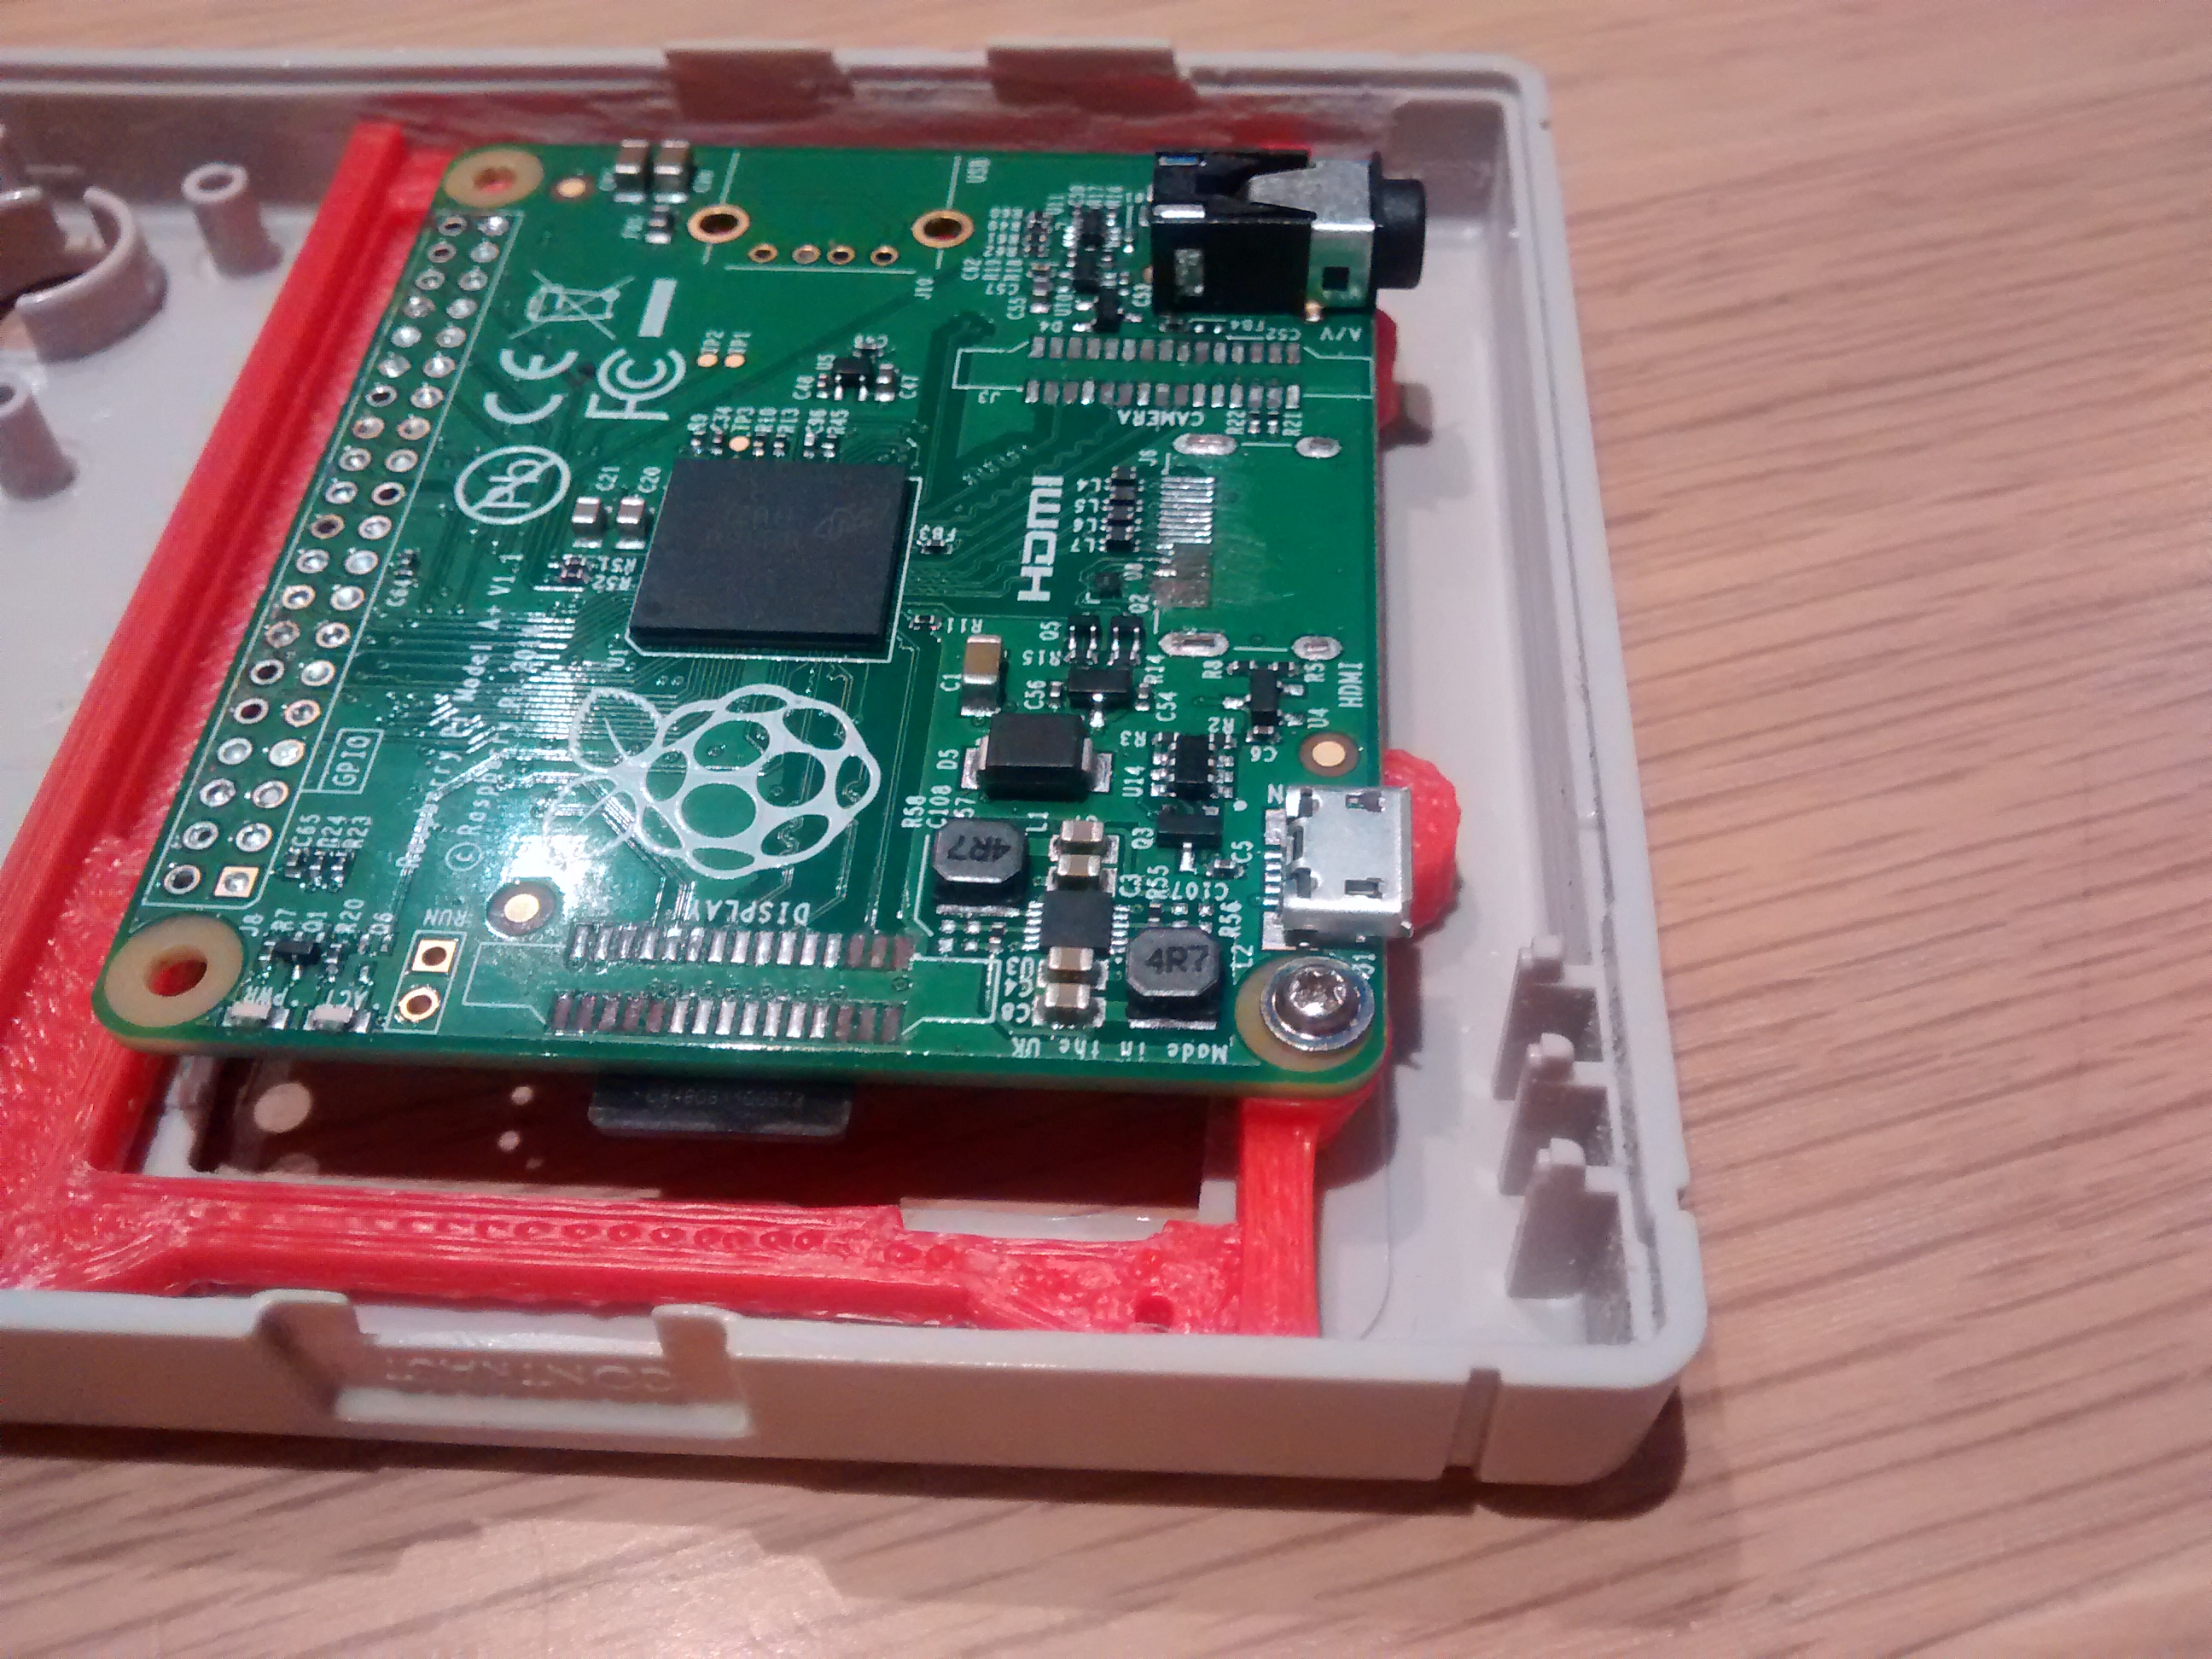
It started out using a Pi-A+ as the zero hadn't been released yet but of course the PiZ makes much more sense
The project has scope creeped beyond all recognition as people keep coming up with cool ways to improve the project, like DPI displays...
but I have something up my sleeve that AFAIK no-one has done in a GBZ yet and will be ready for unveiling soon.
Anyway some pics!
Where I'm at:
gutted the case of a dead and poor condition DMG.
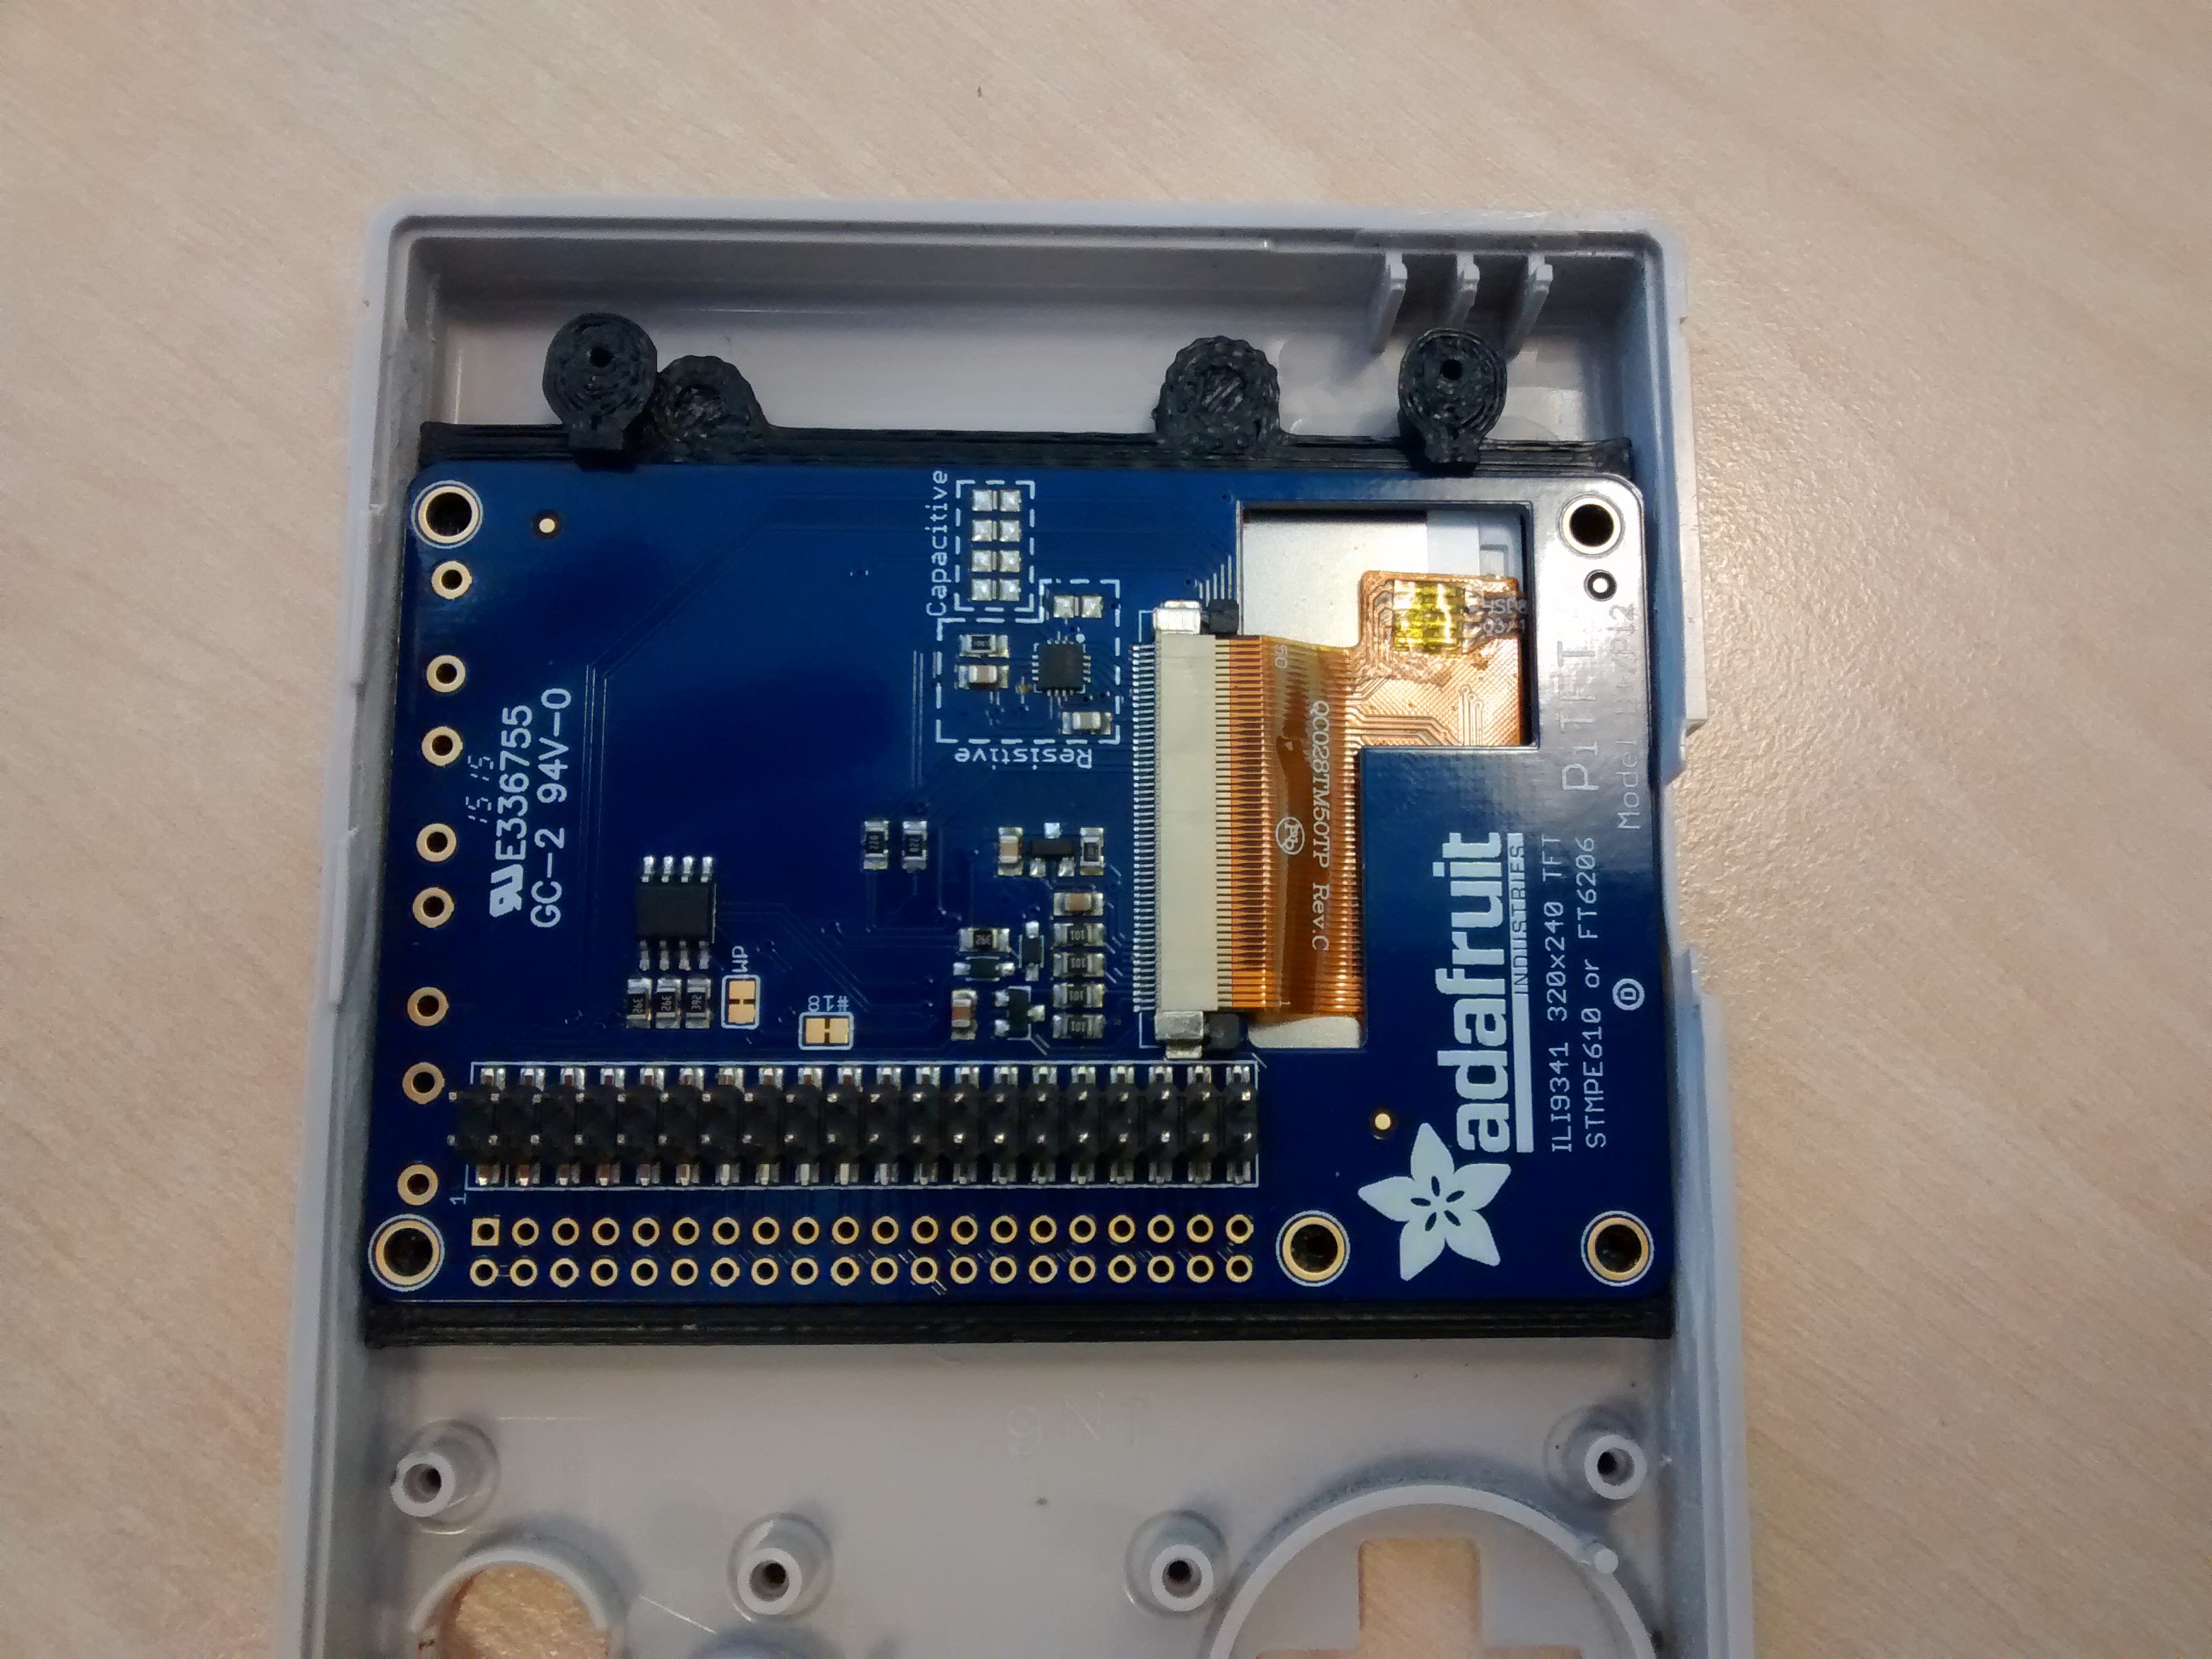
Using the 2.4" adafruit SPI PiTFT, I've made a 3D printed harness to hold the screen and the Pi in position to keep the cartridge port area clear.
Desoldered all the superfluous stuff from the Pi A+ (now using a PiZ so that was a giant waste of time!)
I've desoldered the original DMG-AMP chip to re-use as the amp in the project.
Control panel to use I2C MCP23017 (or SPI 23S17 variant) port expanders keeping the GPIO free to use DPI
got the C code working for the [to be revealed] component
need to:
Cut the original PCB to keep the original power switch.
design the control panel PCB for all my custom bits.
drill the extra front and rear buttons.
Fit everything in.
tidy the casing (it's badly worn/yellowed so needs retrobriting so I'll probably just spray it as that covers any filler needed from the button mods)
make custom lens (laser cutter! yay!)
some other stuff I've forgotten

