RasPiZeroBoy build #2 (in progress)

Show off your completed Game Boy Zero, or post your build logs here!
Post Reply
Zero
Posts: 157
Joined: Fri Sep 02, 2016 6:32 pm
Location: Bristol, UK
Has thanked: 11 times
Been thanked: 35 times

RasPiZeroBoy build #2 (in progress)

Post by Zero » Wed Sep 21, 2016 10:48 am

Started on another build after the 'success' of the first one I made which can be seen here:
http://www.sudomod.com/forum/viewtopic.php?f=9&t=1353

This one will differ from the previous build in the following ways:

-Back buttons
-composite screen
-will use full screen width
-custom surround
-screen display buttons
-extra buttons on front
-rechargable battery
-battery status lights
-cleaner internal layout (hopefully with less wiring)

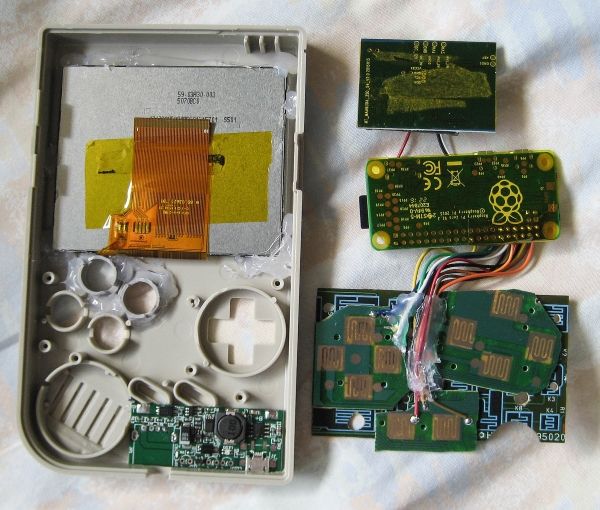
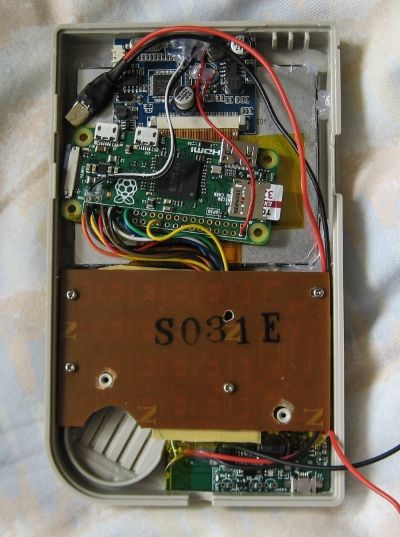
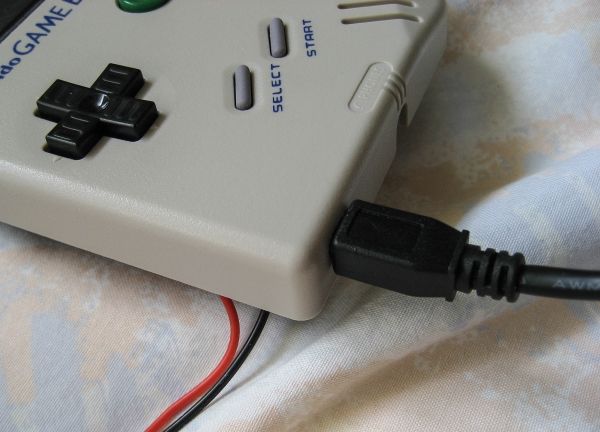
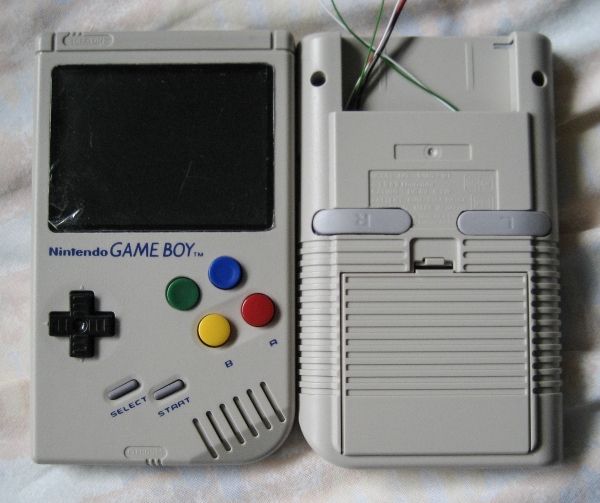
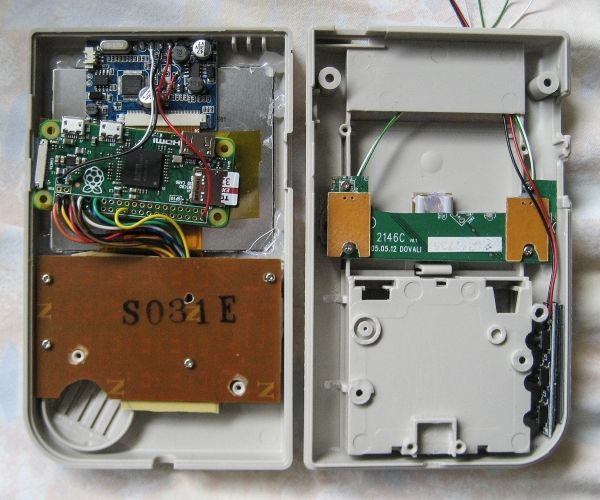
Here's a few pics of progress so far (wiring is subject to changes):

Image
Image

Used an 11mm step bit to cut nice clean button holes on the front. I was surprised at how easy and well it made nice holes. Was initially paranoid I was going to ruin the by case using it. Back holes were cut out with a jewellers saw and slowly expanded using dremel/files to get right shapes.

Then used the jewellers saw again to cut out the bulk of the screen area. Re-used the 3.5" BW screen plastic as the base for the gameboy screen surround. I went for a rectangular shape as opposed to the curved corner that most people seem to choose, as I wanted to use the whole display area.

Used another snes controller's buttons glued to an old remote control circuit board (as there was less stuff to desolder to make it flat).

User avatar
CaptainDurden
Posts: 133
Joined: Wed Sep 07, 2016 1:24 pm
Has thanked: 70 times
Been thanked: 48 times

Re: RasPiZeroBoy build #2 (in progress)

Post by CaptainDurden » Wed Sep 21, 2016 12:30 pm

nice work so far, but from a purely aesthetic point of view the completely square screen just looks "off" to me. same with kite's build, it's all nice and clean and probably nicer-looking than anything i will ever do, but then that square screen just makes it look weird and not gameboyish anymore.
Helder wrote:People spend so much time in asking questions and no time looking for an answer that is available.

Zero
Posts: 157
Joined: Fri Sep 02, 2016 6:32 pm
Location: Bristol, UK
Has thanked: 11 times
Been thanked: 35 times

Re: RasPiZeroBoy build #2 (in progress)

Post by Zero » Wed Sep 21, 2016 12:44 pm

I agree in a way. The choice is either to have the smaller screen area, allowing the curve but with a black area, or the full area and it being a rectangle. I think it looks odd with the curve and the black area too. This one does look better when the screen is on, I'll do some photos of it like that soon. Need to peel the protective plastic off too at some point, it makes it look strange in the photo there, but thought I'd leave that until the end. I might have to do a 3rd build with the curve next. :D

Zero
Posts: 157
Joined: Fri Sep 02, 2016 6:32 pm
Location: Bristol, UK
Has thanked: 11 times
Been thanked: 35 times

Re: RasPiZeroBoy build #2 (in progress)

Post by Zero » Fri Sep 23, 2016 8:21 am

Found a spot for the power board. Was a tight fit but worked out better than planned.

Image
Image
Image

Zero
Posts: 157
Joined: Fri Sep 02, 2016 6:32 pm
Location: Bristol, UK
Has thanked: 11 times
Been thanked: 35 times

Re: RasPiZeroBoy build #2 (in progress)

Post by Zero » Sun Sep 25, 2016 2:38 am

I have some banggood power boards which seem to work well but don't have a low battery indicator on them. So I'm on the hunt for a battery indicator board. All the ones I've tried so far don't work under 4v which is useless for my build.

I originally bought an adafruit power board but didn't realise at the time there were different versions of them (charging and non-charging). All places were out of stock of the charging ones (UK) after I realised and now I have this banggood one I want to use this instead of paying out a lot more.

So if anyone has any suggestions please let me know.

Nosfay
Posts: 25
Joined: Mon May 23, 2016 4:32 pm
Been thanked: 3 times

Re: RasPiZeroBoy build #2 (in progress)

Post by Nosfay » Tue Sep 27, 2016 4:25 pm

Hi,

This kind of boardis cheap and works fine, you can also replace the 4 leds by a tricolor one.

The only thing you need is a "double" switch to shutdown battery indicator board and raspberry at the same time.

Zero
Posts: 157
Joined: Fri Sep 02, 2016 6:32 pm
Location: Bristol, UK
Has thanked: 11 times
Been thanked: 35 times

Re: RasPiZeroBoy build #2 (in progress)

Post by Zero » Tue Sep 27, 2016 4:28 pm

Thanks I ordered a few of those the other day. As with most of our builds, we play the waiting game when ordering stuff from China. :D

Post Reply

Who is online

Users browsing this forum: No registered users and 1 guest