Page 1 of 4
Retroheads GB2
Posted: Sat May 14, 2016 10:23 pm
by Retrohead95
Hey everyone so I decided to tackle the Pi Gameboy. I'm 20 but have been soldering since I was 14 so the soldering isn't a problem. The only thing I'm worried about is keeping everything together to upgrade later and wiring it correctly. I'm guessing I'll have to go through a few iterations or small steps to get it where I want it to be.
I also got the pi 3 but after discovering its tendency to overheat and its heavy power consumption I decided to go to the pi 2. I have all the parts I need except the teensy, battery, power switch, breadboard and the pi 2. After seeing adafruits expensive shipping I have a hard time convincing myself to get it.
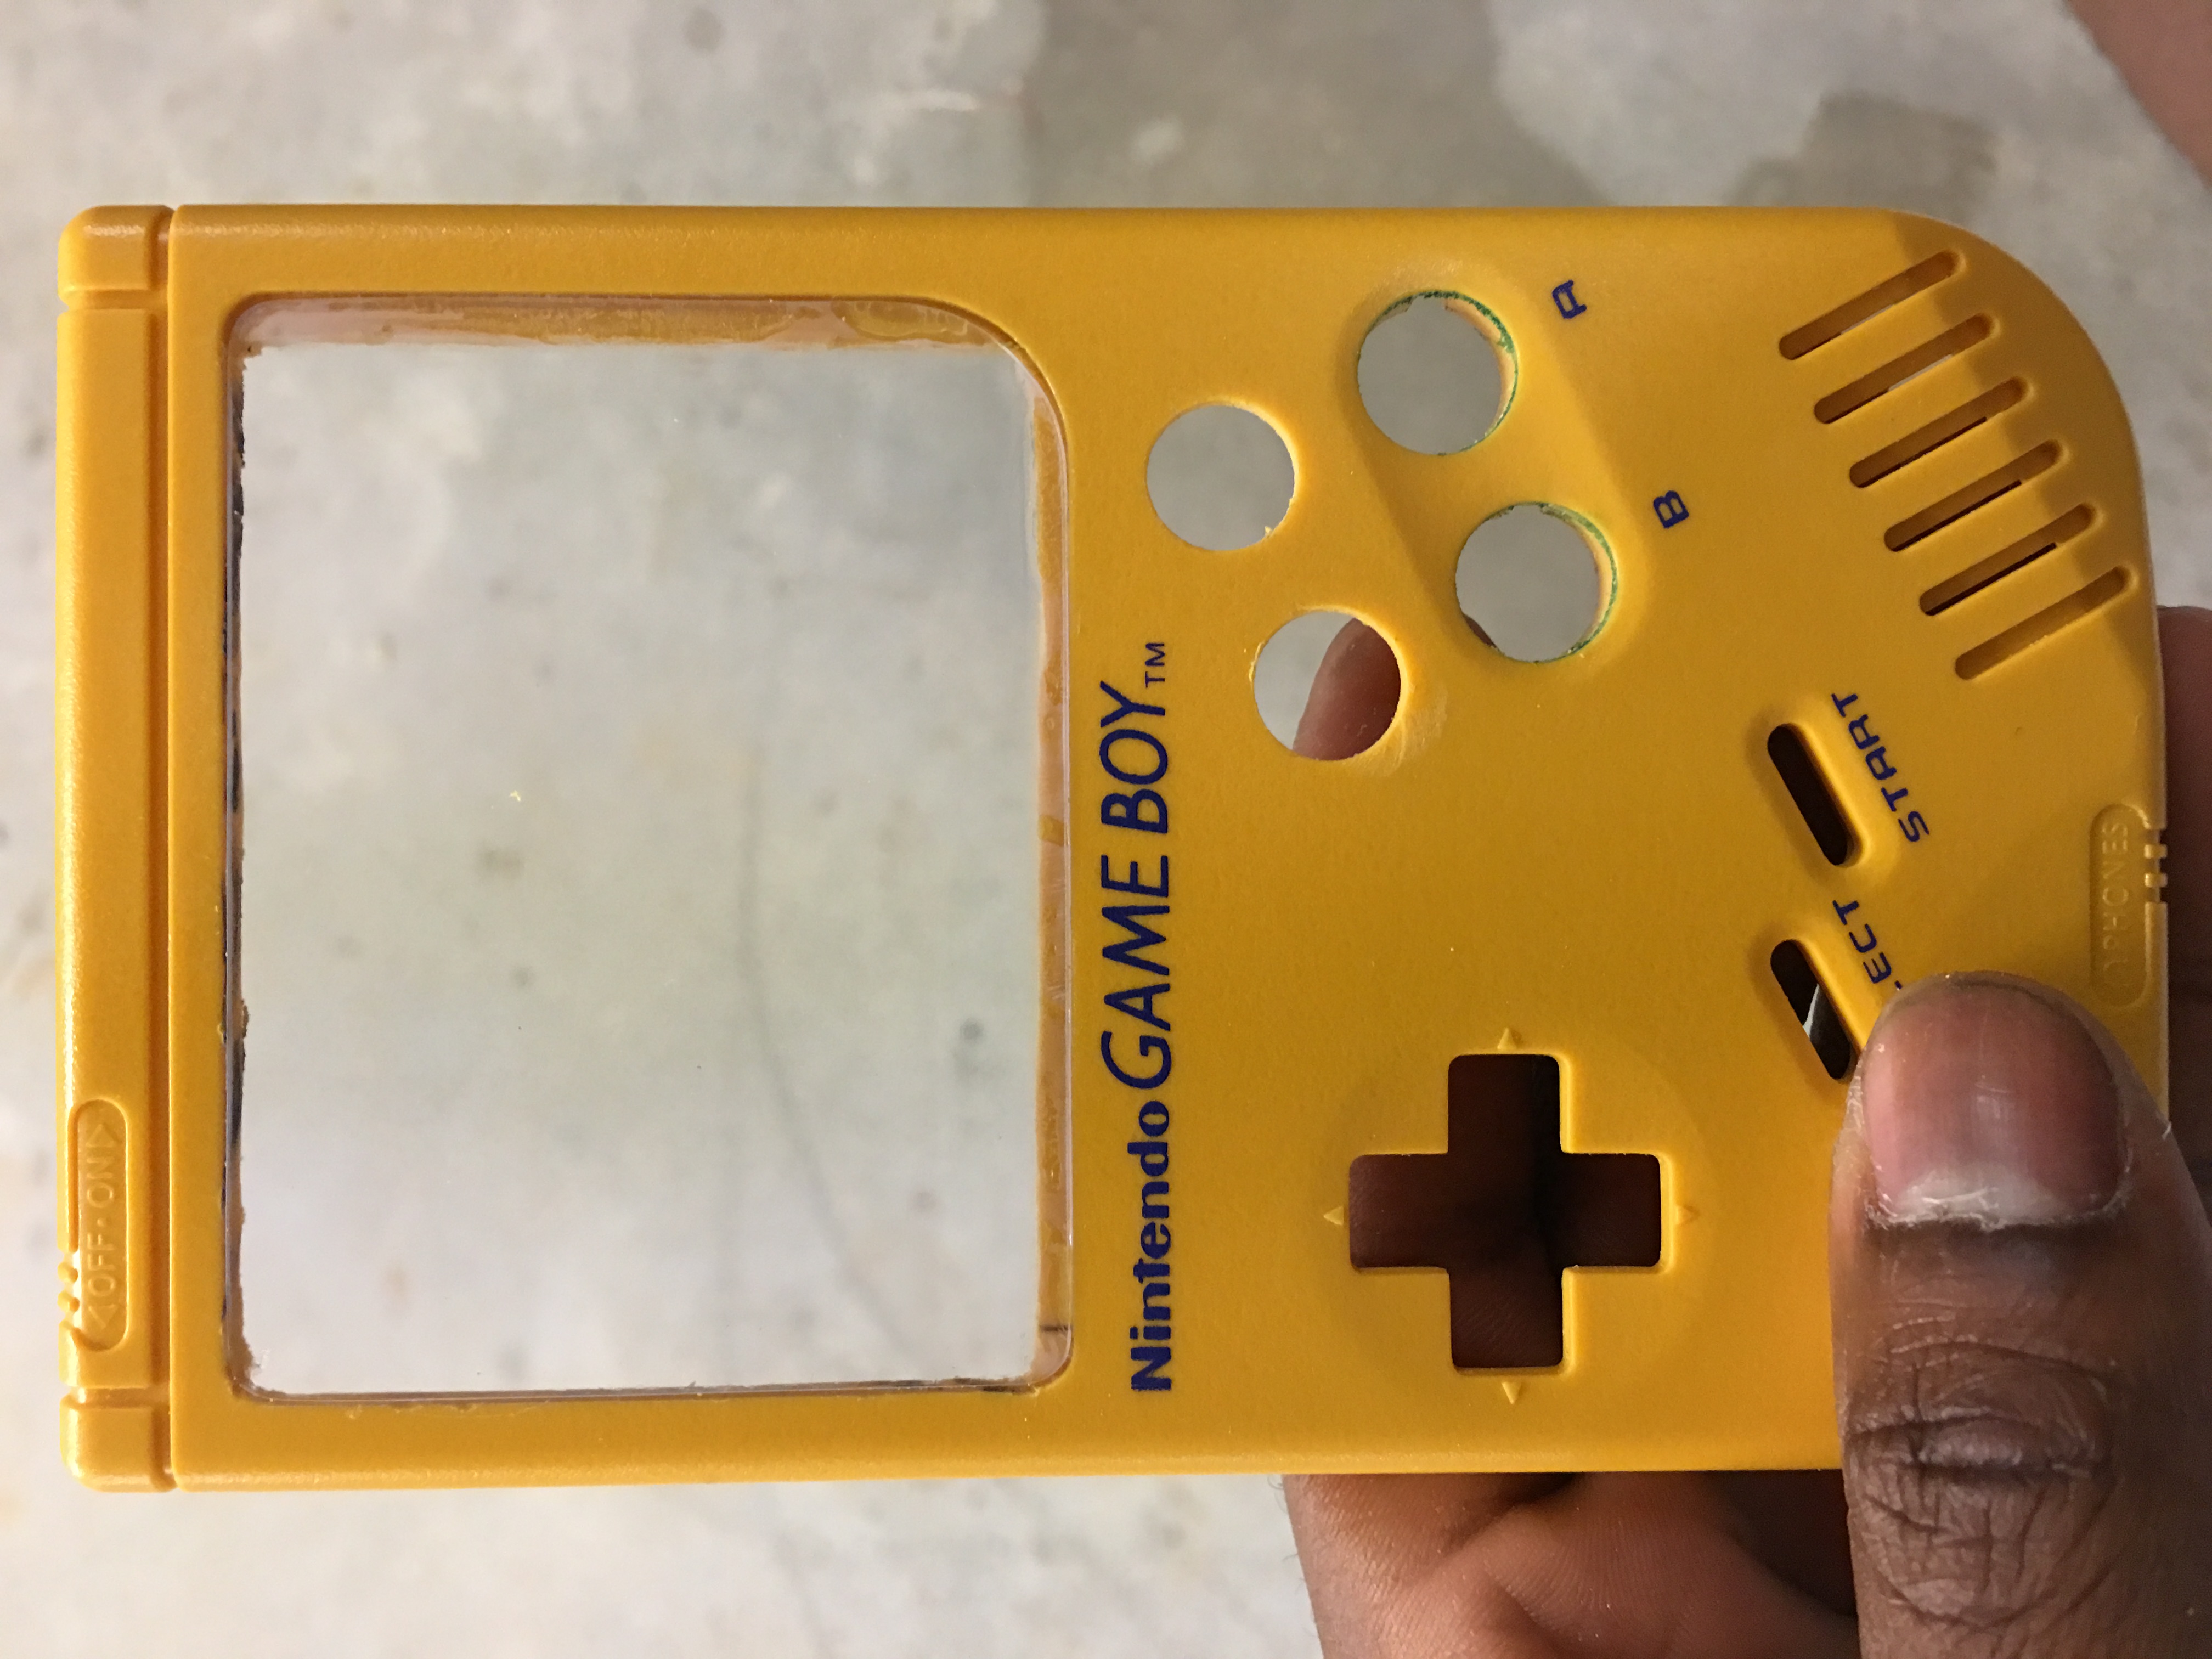
I cut my x and y buttons in my last case and surprisingly I had the exact dremel bit for cutting the buttons so all I did was mark the buttons and dremel. I did however manage to mess up the back when dremeling it to fit my r and l buttons so I ordered a new case. I got my housing from eBay and it came on the same day as @kitch-bent s 4 button PCB board, clear screen cover and buttons.
Here's what it looks like
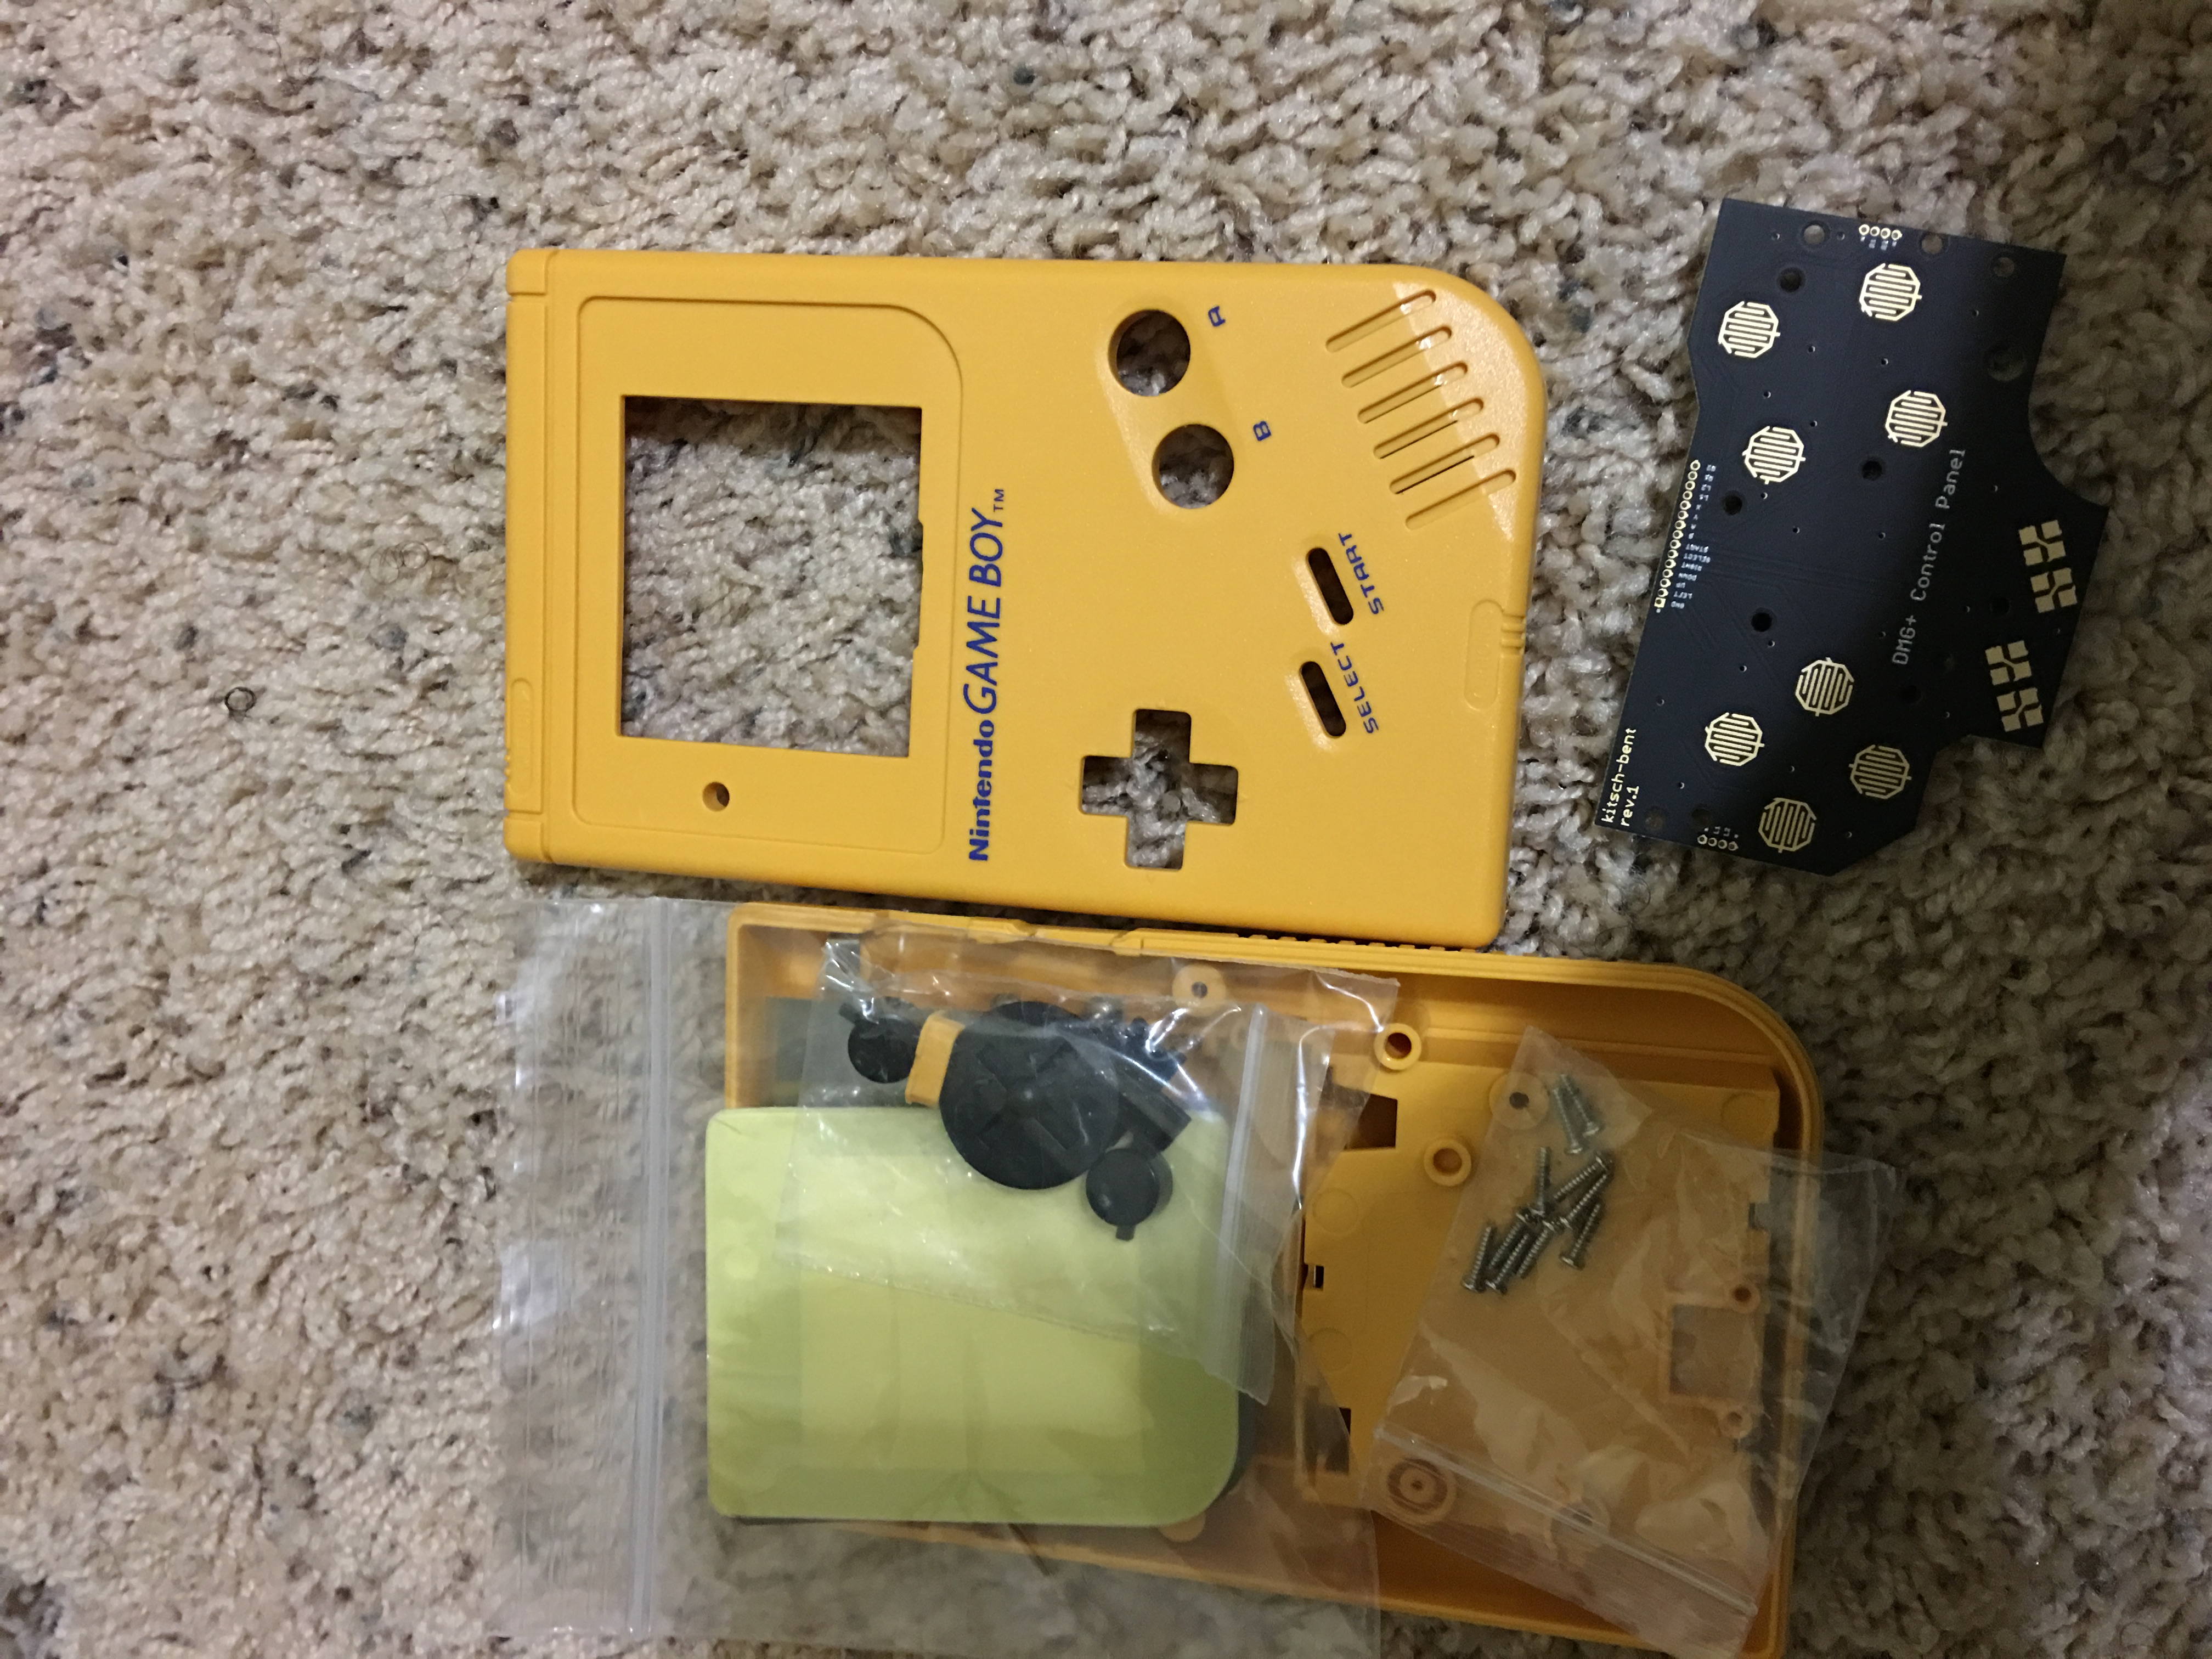
- image.jpeg (2.16 MiB) Viewed 11689 times
I plan on dremeling the hole for the x and y buttons tomorrow so I'll see how that goes.
Re: Retroheads GB2
Posted: Sat May 14, 2016 11:40 pm
by Kilren
Retrohead95 wrote:I plan on dremeling the hole for the x and y buttons tomorrow so I'll see how that goes.
I like the yellow case. I saw a semi-transparent green one the other day I might try doing a build in later just because it looks fun.
Are you super comfortable with the dremel? Unless you're doing a lot of woodworking or other heavy router work, they can be tricky. If you have access to a drill, it is a safer method for holes that have to constantly be seen. Just always start with either a pilot hole or a punch.
Now if you are comfortable with a dremel, have fun. I'm excited to see your build in the yellow submarine.
Re: Retroheads GB2
Posted: Sat May 14, 2016 11:53 pm
by Retrohead95
Kilren wrote:Retrohead95 wrote:I plan on dremeling the hole for the x and y buttons tomorrow so I'll see how that goes.
I like the yellow case. I saw a semi-transparent green one the other day I might try doing a build in later just because it looks fun.
Are you super comfortable with the dremel? Unless you're doing a lot of woodworking or other heavy router work, they can be tricky. If you have access to a drill, it is a safer method for holes that have to constantly be seen. Just always start with either a pilot hole or a punch.
Now if you are comfortable with a dremel, have fun. I'm excited to see your build in the yellow submarine.
Thanks man I'll keep you posted. I'm relatively comfortable using the dremel now. I used it on my last case and cut the x and y holes perfectly, Only thing that I'm worried about is cutting the L and R buttons like chiz did in the back which is what ruined my last housing

. The trick that I use is start small and increase the size gradually. Then use the low setting on it. I also put my left hand on one end, hang it half way off the table and use my right hand to dremel. Been working great so far.
Re: Retroheads GB2
Posted: Tue May 17, 2016 12:02 am
by Retrohead95
Decided to work on the front of the housing today. I also decided to go with the pi zero since I'll mostly be isn't this for Gameboy and Super Nintendo Roms. Now back to the housing. I Checked and @kitsch-Ben s controller board fits perfectly.
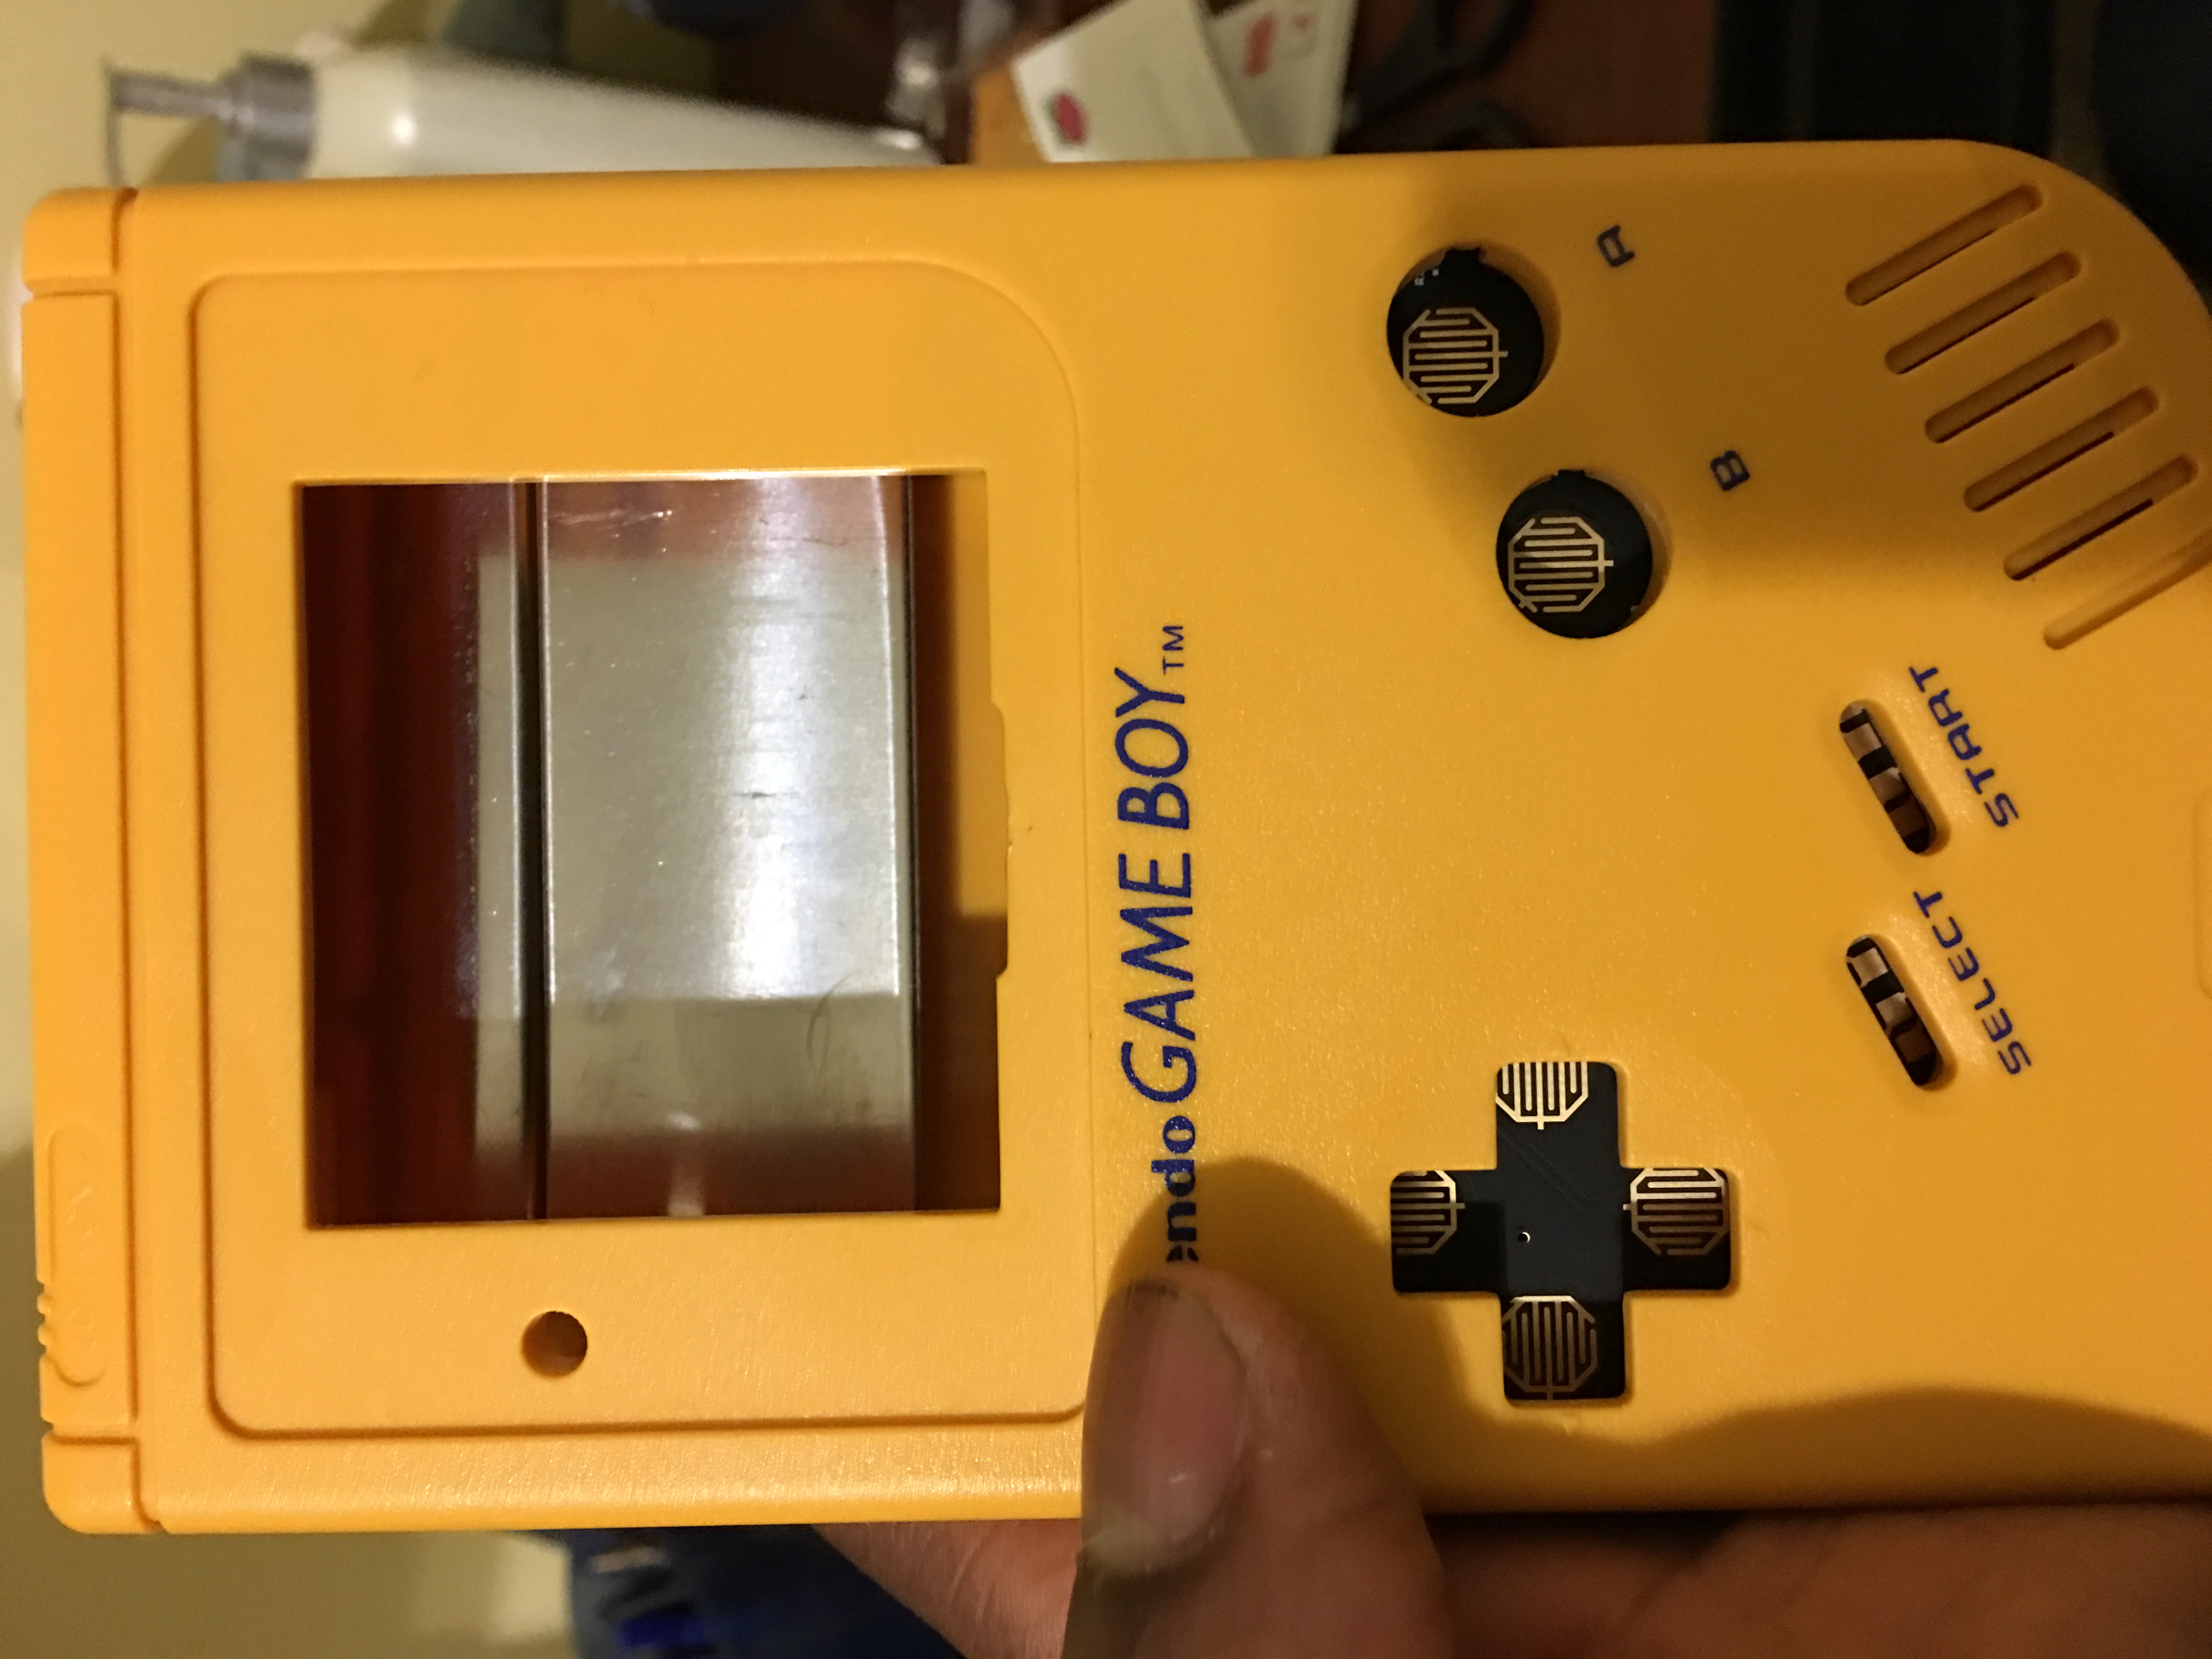
- image.jpeg (1.53 MiB) Viewed 11590 times
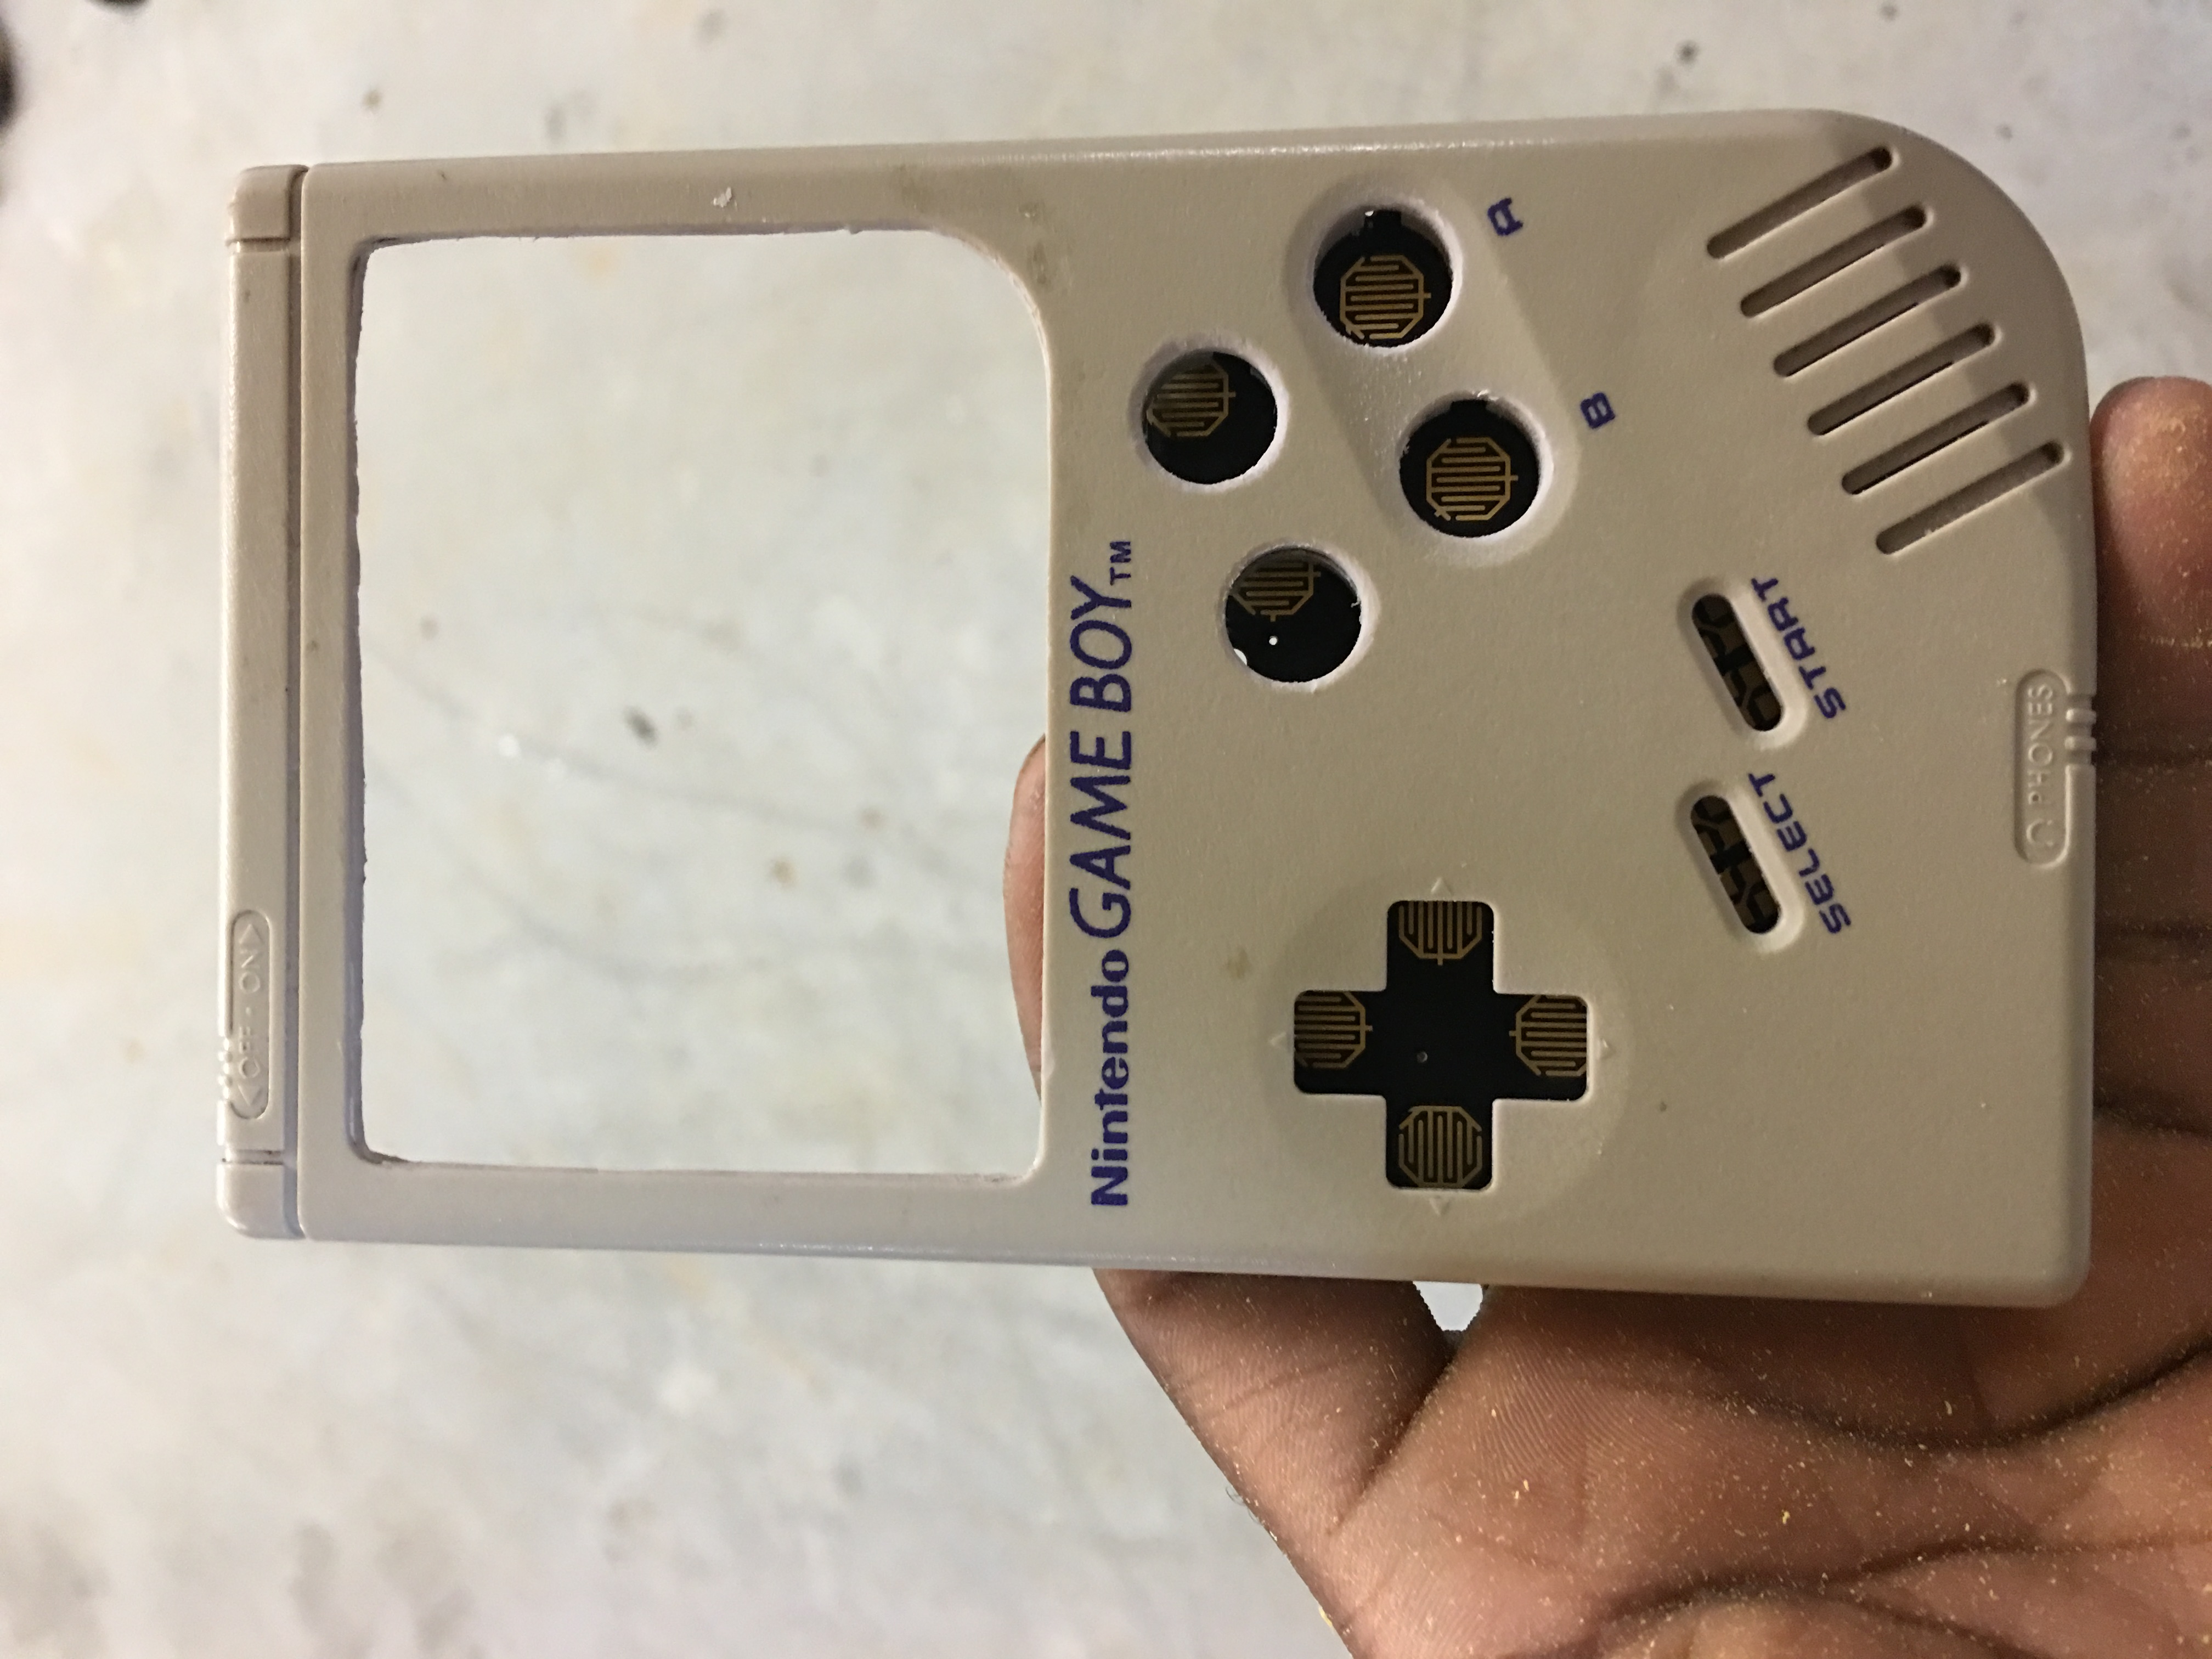
You can see here where I messed up on my original housing. Was rushing it and my dremel battery died twice during this.
- image.jpeg (1.43 MiB) Viewed 11590 times
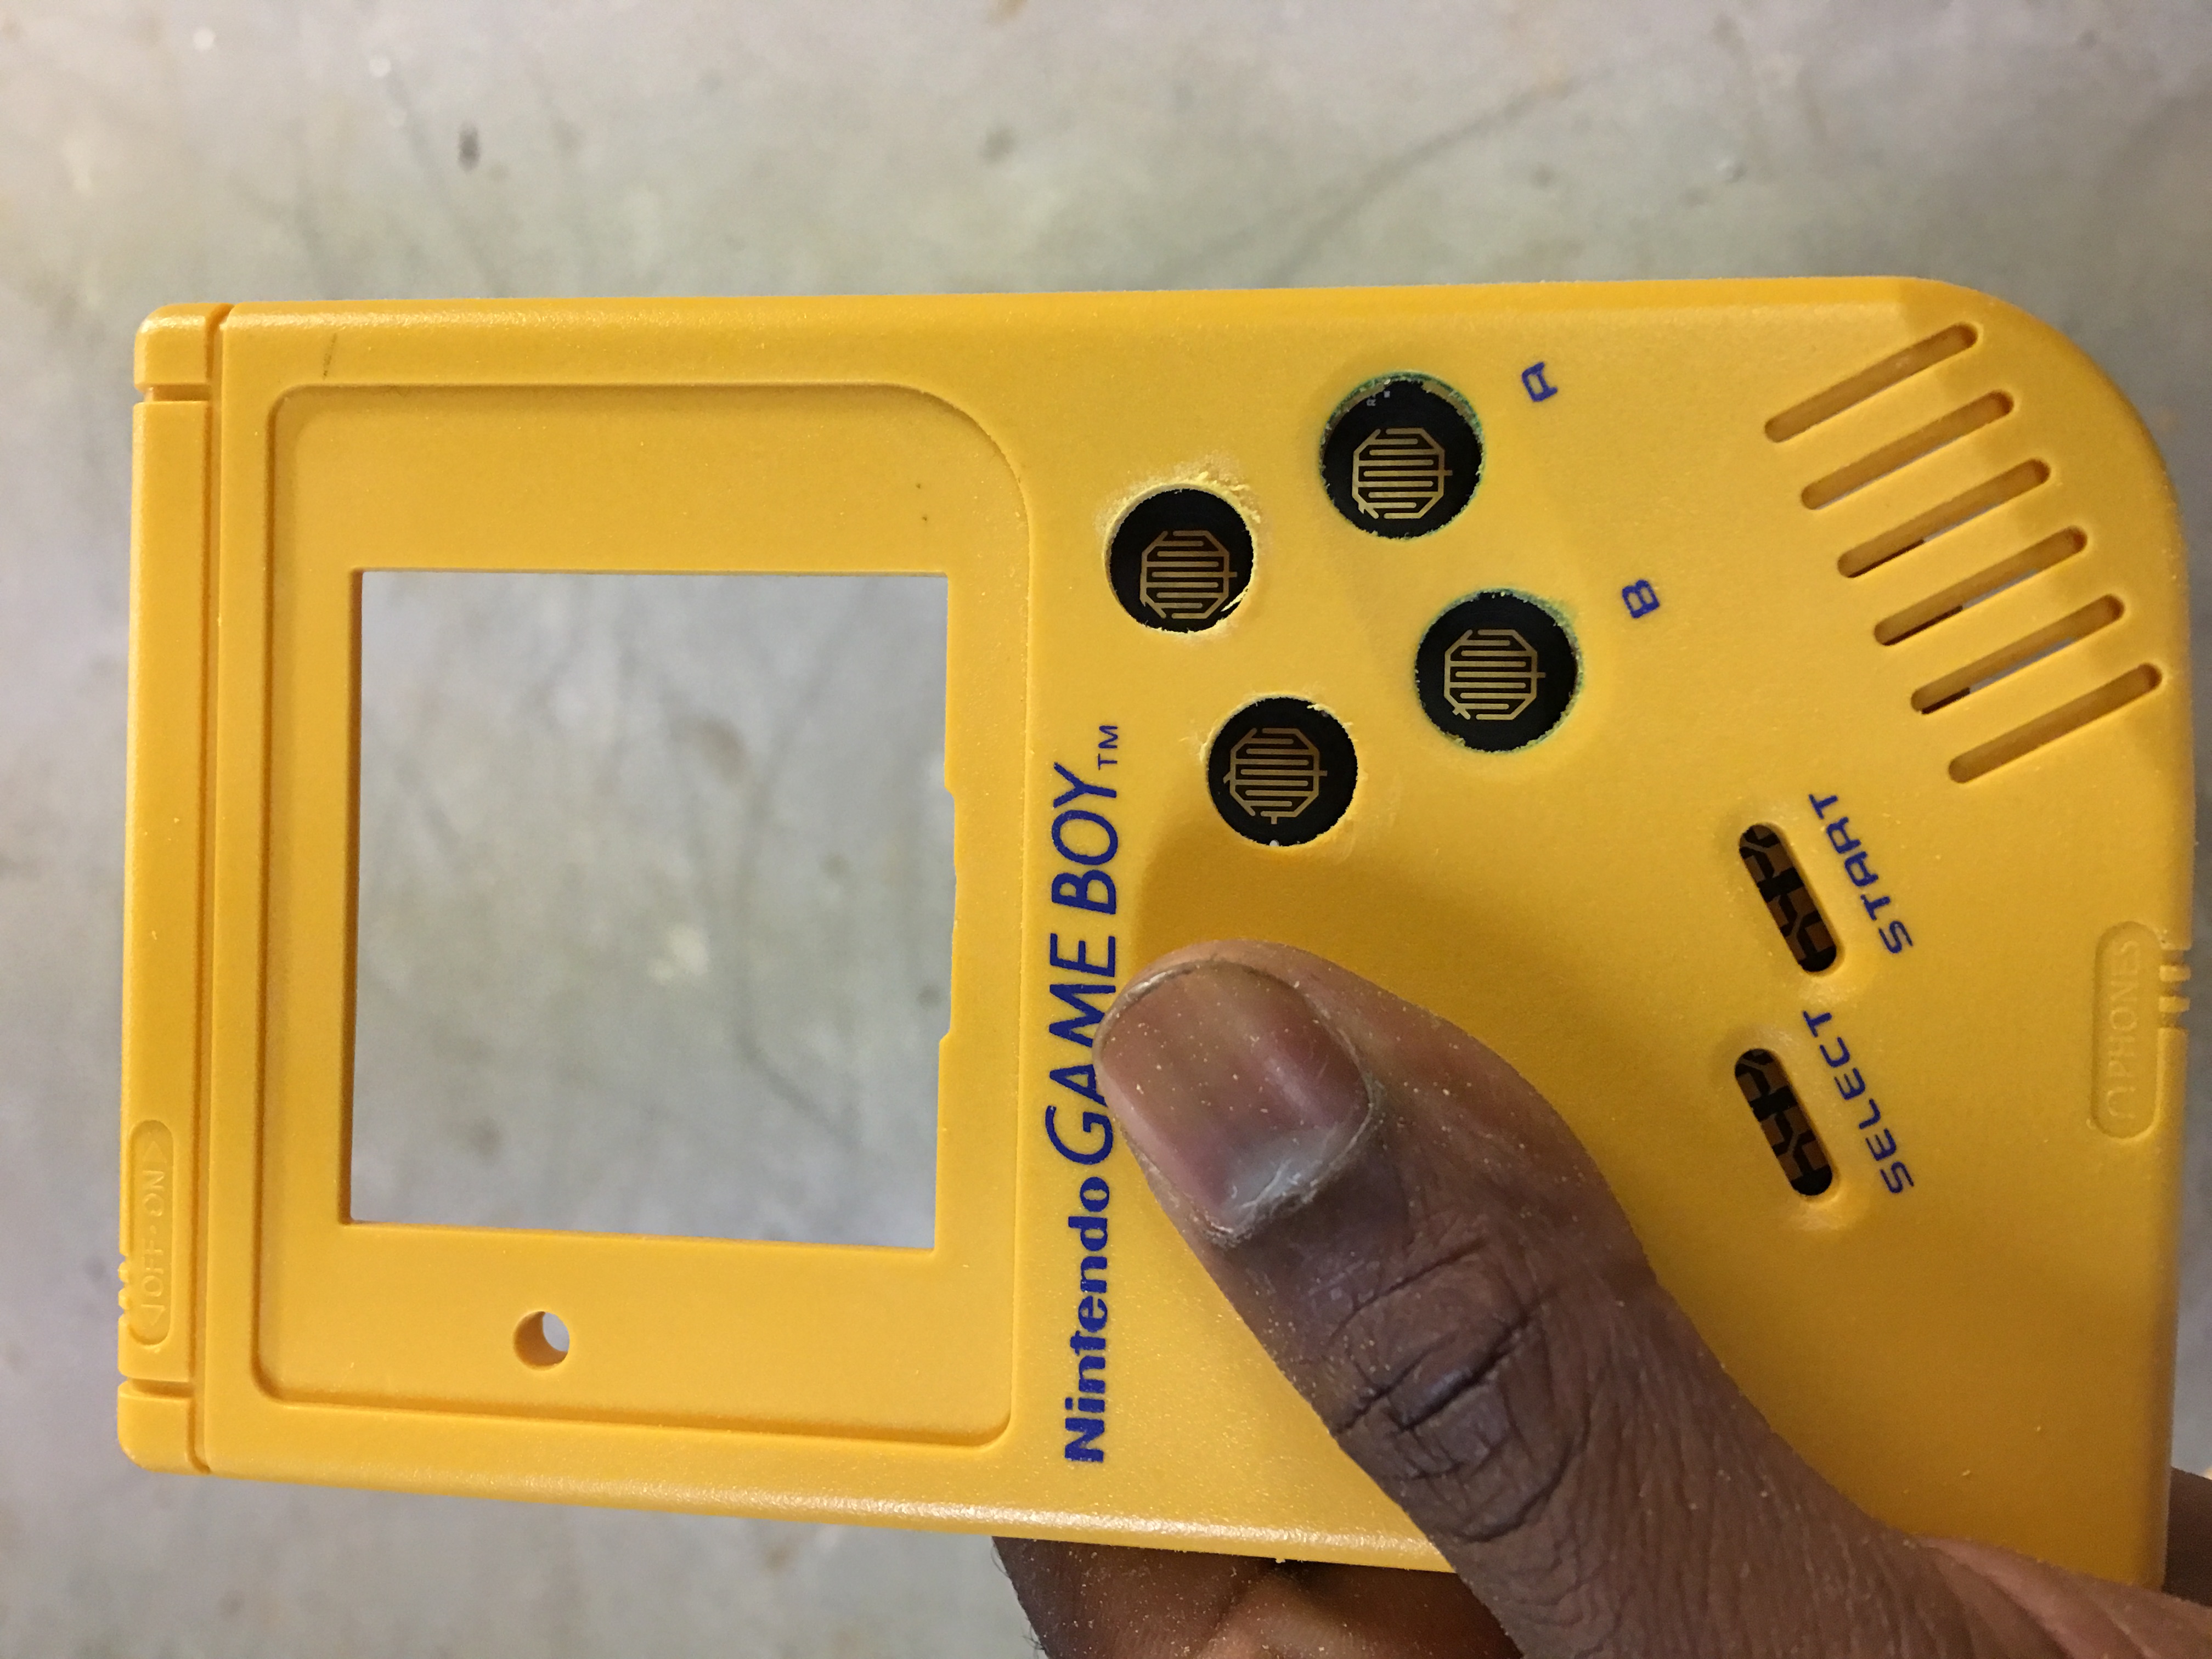
Dremeled the holes for the x and y buttons and they fit perfectly. Dremel battery died 3 times lol. I have no idea how it dies so fast, it's not even 2 months old.
- image.jpeg (1.58 MiB) Viewed 11590 times
Dremeled the screen area. Not exactly happy with how it came out. There's also a clear screen protector that I got from @kitsch-Ben on there as well but it's kinda hard to see. I'll probably take the protector off and sand down some more of the bezel to get it looker cleaner.
- image.jpeg (1.52 MiB) Viewed 11590 times
I've been trying to get the snes silicone button pads to fit but have had no luck. Guess I'll try to modify it some more to get it to fit since I don't like how the buttons feel without the pads. I also added button wells but I'll take pictures as soon as I start working on the case again.
Re: Retroheads GB2
Posted: Tue May 17, 2016 12:45 am
by crispy_tofu
Looking good! What's with your dremel battery though?

Re: Retroheads GB2
Posted: Tue May 17, 2016 3:47 am
by Retrohead95
crispy_tofu wrote:Looking good! What's with your dremel battery though?
Lol. It's probably laying on the desk dead as we speak.
Re: Retroheads GB2
Posted: Tue May 17, 2016 4:38 pm
by Retrohead95
Well I managed to ruin the back of this case too trying to get the l and r button holes. Guess I'll have to order a different housing and just using the rear screw hole tactile switches like @wermy did
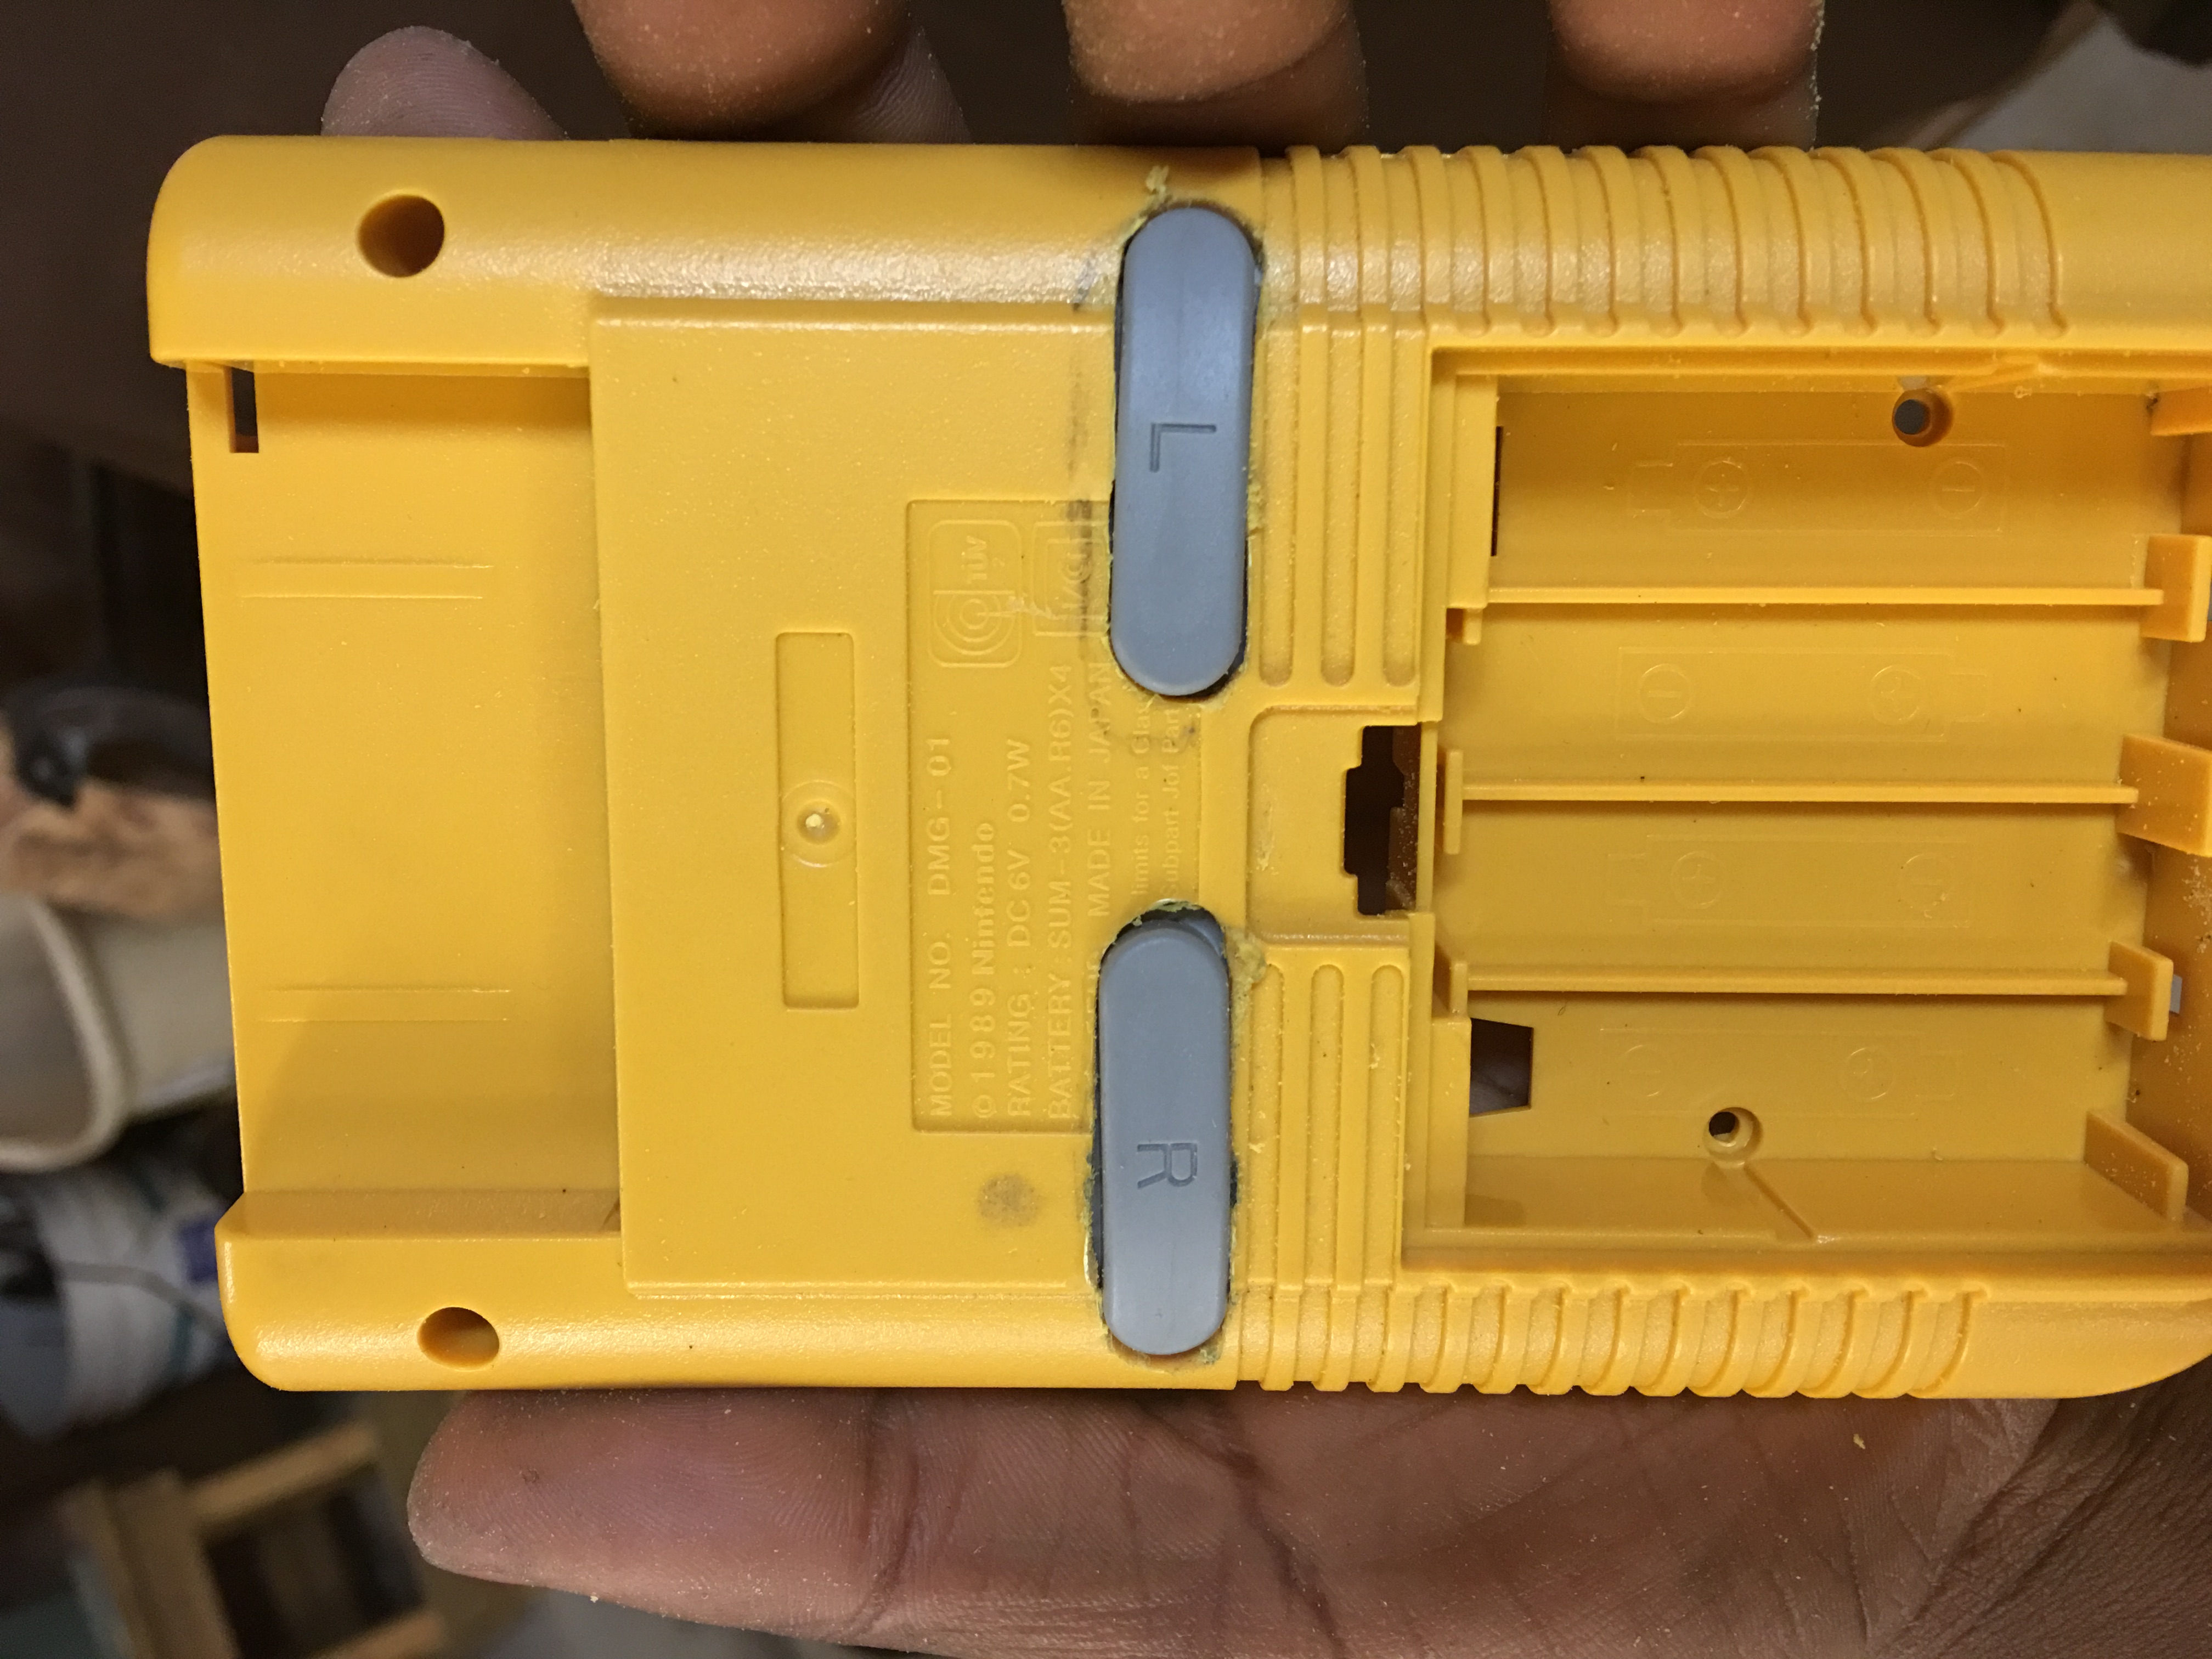
- image.jpeg (1.69 MiB) Viewed 11494 times
Re: Retroheads GB2
Posted: Tue May 17, 2016 5:13 pm
by crispy_tofu
That doesn't look too bad, what's wrong with it?

Re: Retroheads GB2
Posted: Tue May 17, 2016 5:23 pm
by Raquor
I agree with crispy_tofu, the back looks okay to me, maybe try adding a slight angle to the hole to "pretty" it up a bit?
Re: Retroheads GB2
Posted: Tue May 17, 2016 5:28 pm
by DirtyBullets
If there are some gaps then why not make it even better by adding some LED's and let it glow rings around the buttons?
