Page 1 of 3
Hawker's Gameboy Zero
Posted: Sat Jun 25, 2016 6:57 am
by hawker180
Gameboy Zero Project:
So far parts I have:
Faulty DMG-01 Gameboy - Someone left the battery's in it so it had corroded terminals and I could not get the screen working.
Raspberry Pi Zero
3.5" 320x240 Composite TFT LCD
Helder Game Boy Zero Controller PCB With Audio
Adafruit Powerboost 1000C
Adafruit Amp
Teensy-LC
3rd party SNES controller for additional buttons
tactile switches for L+R
From Gameboy: Power switch, headphone jack and Cart reader
Kitsch Bent Cartridge board with microSD (Waiting on delivery)
Battery
Volume Dial
- PHOTO_20160626_185030.jpg (1.23 MiB) Viewed 13729 times
- 13555963_10157158073805201_874039628_o.jpg (165.4 KiB) Viewed 13697 times
Re: Hawker's RetroPie360
Posted: Sun Jun 26, 2016 12:46 am
by grenade44
That's looks great, I'm doing the same sort of project but mines a server not a retropie system. Mine been half done for like 2 years now lol. Im also using a banana pi, due to its sata onboard connections. Im also tempted to connect up the fans lol.
I got a couple of questions.
Does the power button still work on the Xbox? I've been trying to use the original board.
What did you use to do the front usb? 2 female usb cables?
Re: Hawker's RetroPie360
Posted: Sun Jun 26, 2016 1:31 am
by hawker180
Updated photos:
Re: Hawker's RetroPie360
Posted: Sun Jun 26, 2016 2:35 am
by grenade44
hawker180 wrote:grenade44 wrote:
Does the power button still work on the Xbox? I've been trying to use the original board.
What did you use to do the front usb? 2 female usb cables?
I did not bother with the front power button, I just glued the button so it will not move and push on my LED behind it, Plus I have the power button on my 5v input on the back.
The front USB ports I ended up using a USB hub which was lucky enough to fit, But realistically just short USB extension cables will do the job like i used with the memory card port USB.
Something like this would be ideal:
$_57.jpg
Thanks alot they look like they would do the job, I think I'm going to finally finish my one off lol. Hoping to use the power button tho. I've learnt alot from doing my GBZ.
Re: Hawker's RetroPie360
Posted: Sun Jun 26, 2016 3:58 am
by hawker180
grenade44 wrote:hawker180 wrote:grenade44 wrote:
Does the power button still work on the Xbox? I've been trying to use the original board.
What did you use to do the front usb? 2 female usb cables?
I did not bother with the front power button, I just glued the button so it will not move and push on my LED behind it, Plus I have the power button on my 5v input on the back.
The front USB ports I ended up using a USB hub which was lucky enough to fit, But realistically just short USB extension cables will do the job like i used with the memory card port USB.
Something like this would be ideal:
$_57.jpg
Thanks alot they look like they would do the job, I think I'm going to finally finish my one off lol. Hoping to use the power button tho. I've learnt alot from doing my GBZ.
It should be fairly easy to mount a small switch behind the button on the metal casing, but getting the LED to shine through might be hard as well.
Re: Hawker's RetroPie360 + Gameboy Zero
Posted: Sun Jun 26, 2016 5:25 am
by hawker180
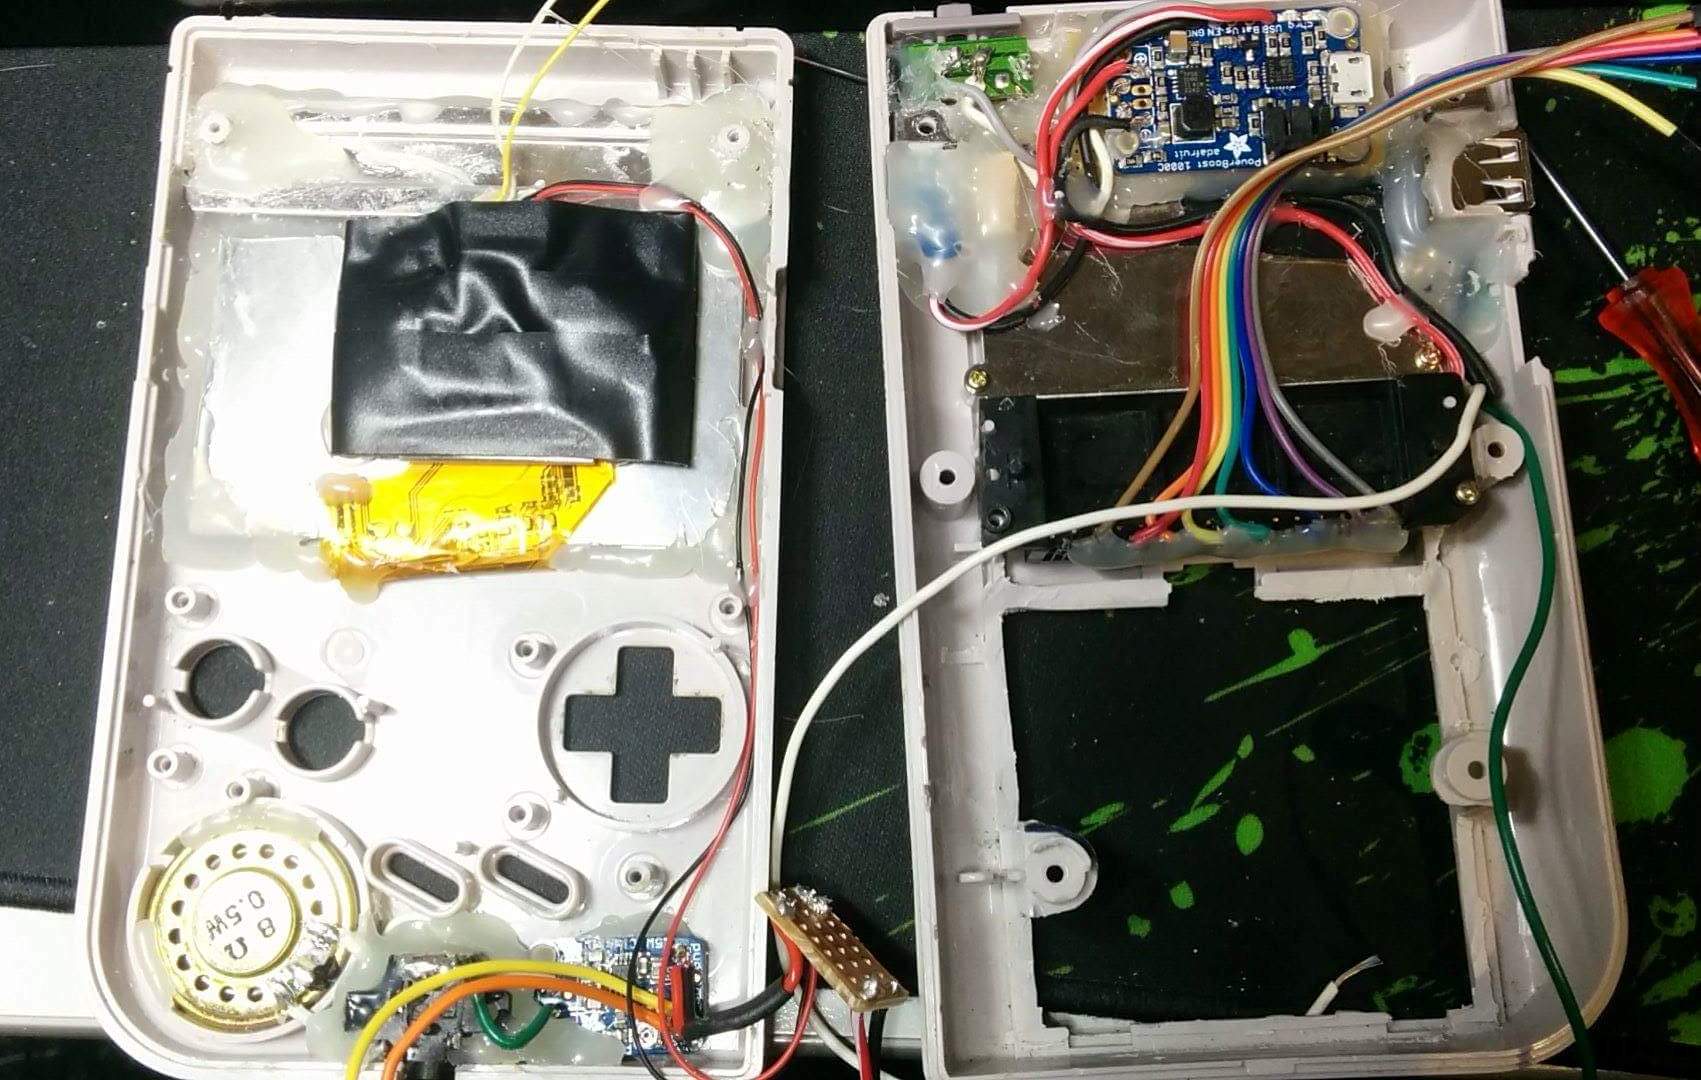
Just finished the audio, works well
![PHOTO_20160626_212050[1].jpg](./download/file.php?id=776)
- PHOTO_20160626_212050[1].jpg (214.11 KiB) Viewed 13690 times
Re: Hawker's RetroPie360 + Gameboy Zero
Posted: Tue Jun 28, 2016 7:58 am
by hawker180
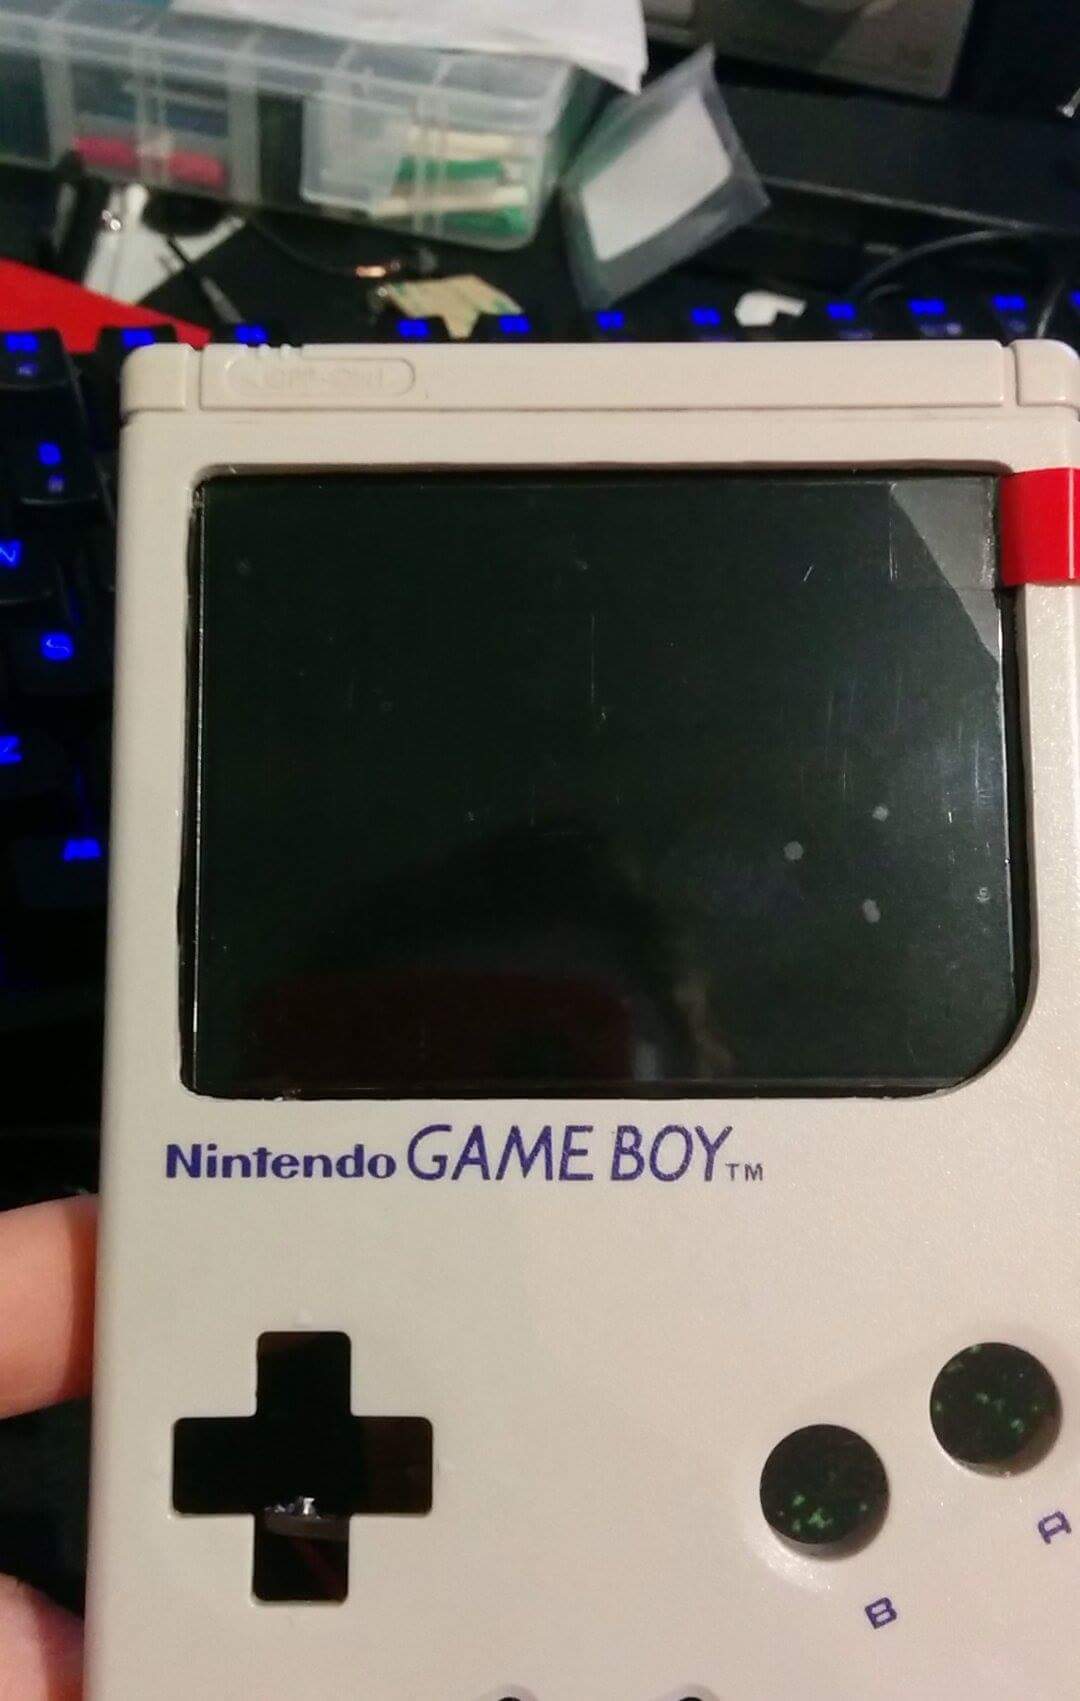
Screen running off 5v

- received_10157166955895201.jpeg (159.64 KiB) Viewed 13596 times
- received_10157166281640201.jpeg (88.33 KiB) Viewed 13596 times
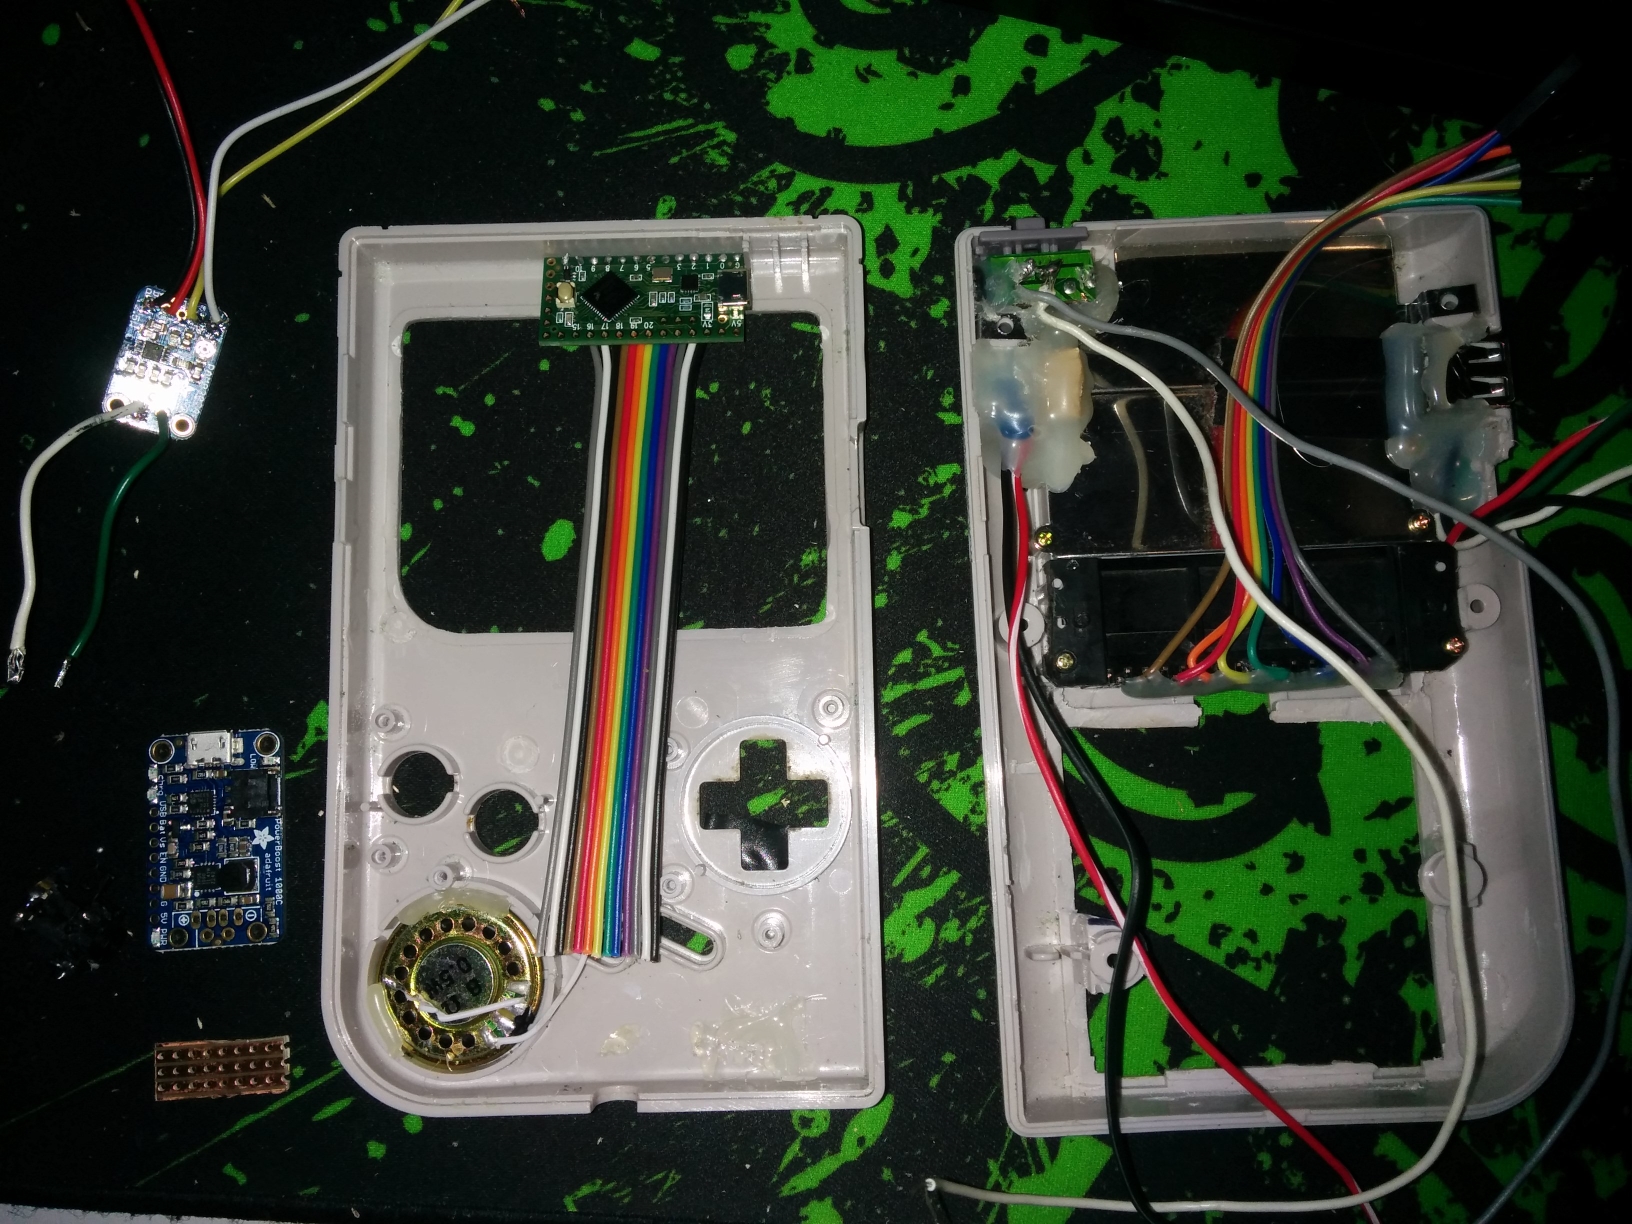
Everything which is mounted atm, waiting on my Controller pcb and a few extras:
- 1.jpeg (234.92 KiB) Viewed 13532 times
Rough layout of the remaining parts
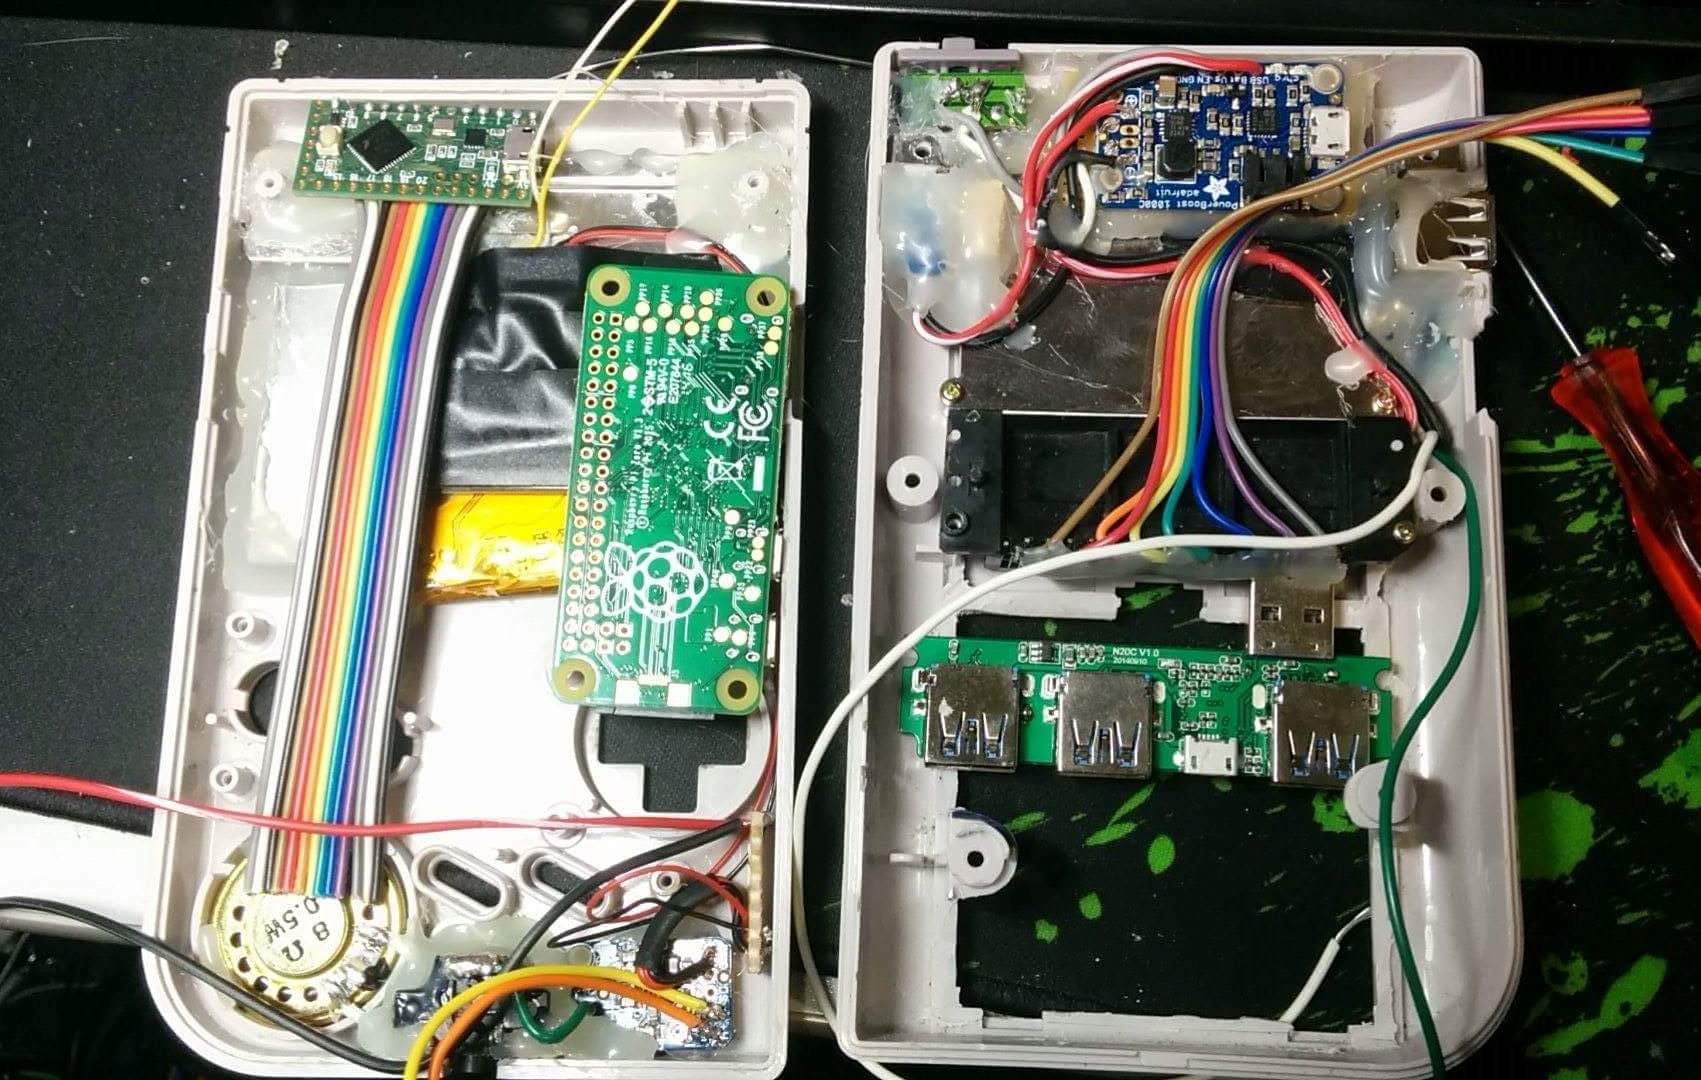
- 2.jpeg (263.92 KiB) Viewed 13532 times
My 3 port USB hub is unfortunately USB3.0, the size is perfect but it requires additional 5v feed, but the big thing is the Pin's are small to solder onto so it add's some complexity.
Re: Hawker's RetroPie360 + Gameboy Zero
Posted: Sun Jul 03, 2016 4:04 am
by hawker180
Extra buttons are done:
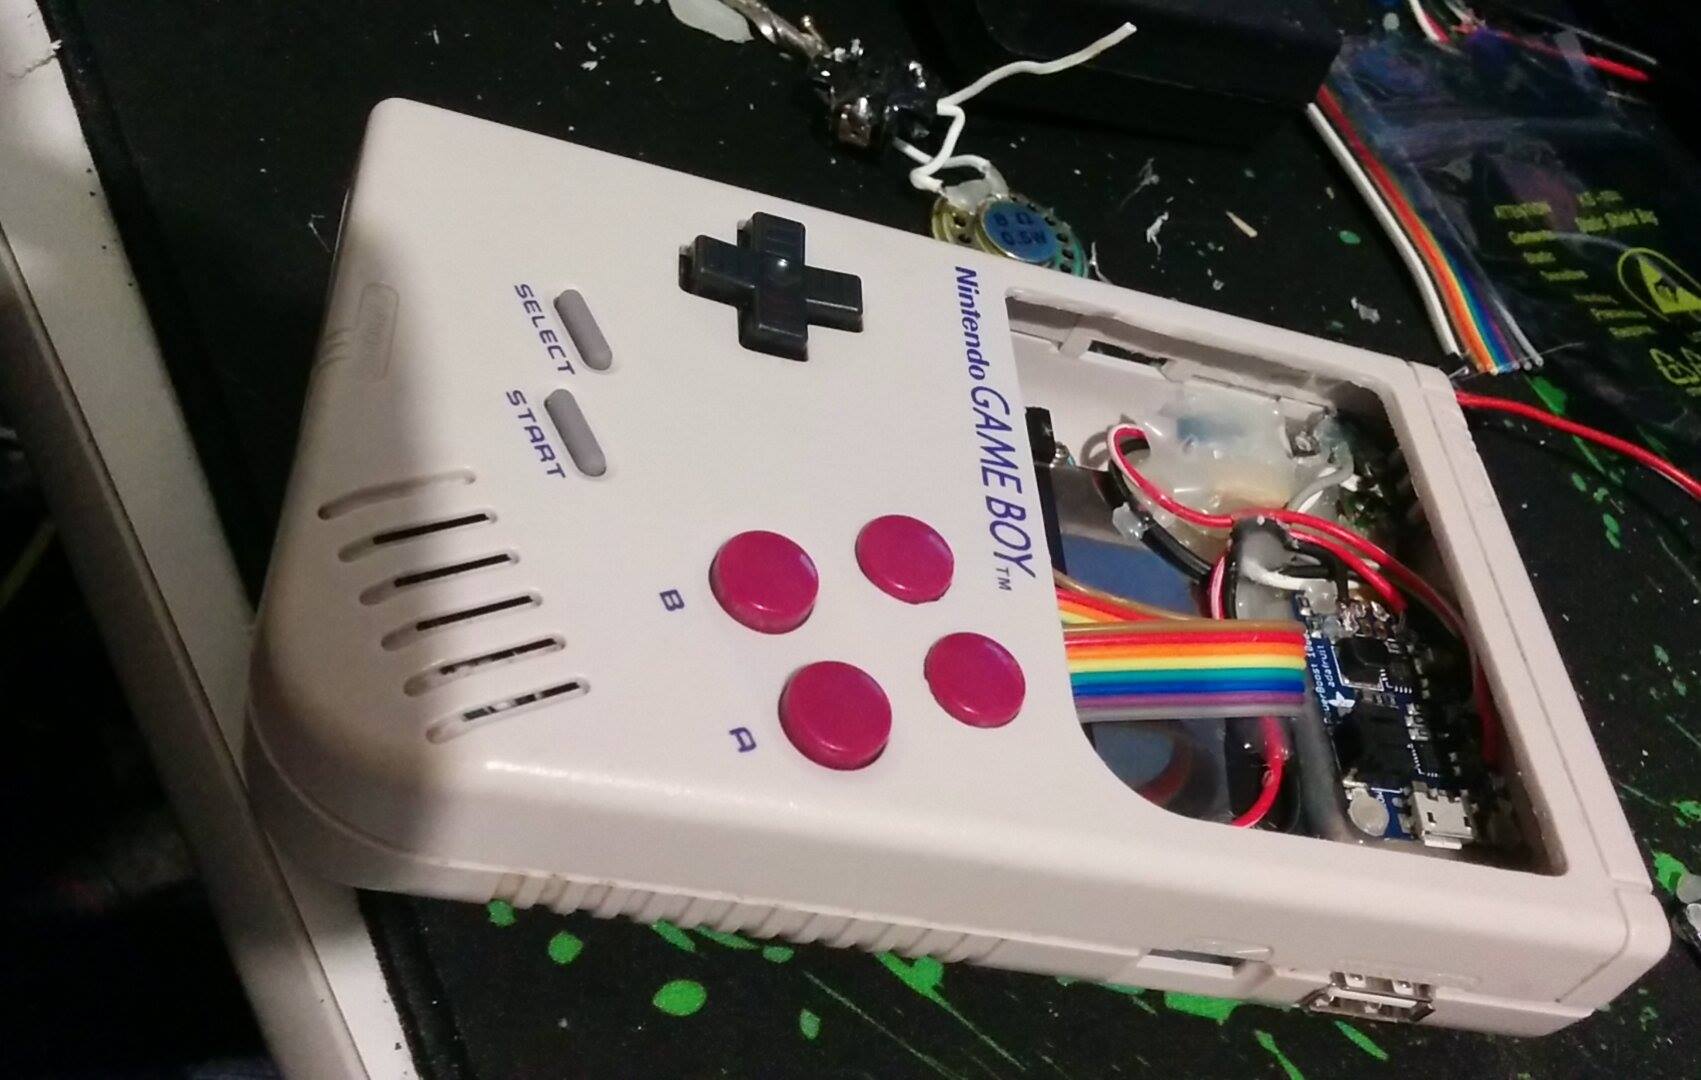
- 13523981_10157175079370201_1134822727_o.jpg (151.37 KiB) Viewed 13454 times
L+R buttons done on the back as well
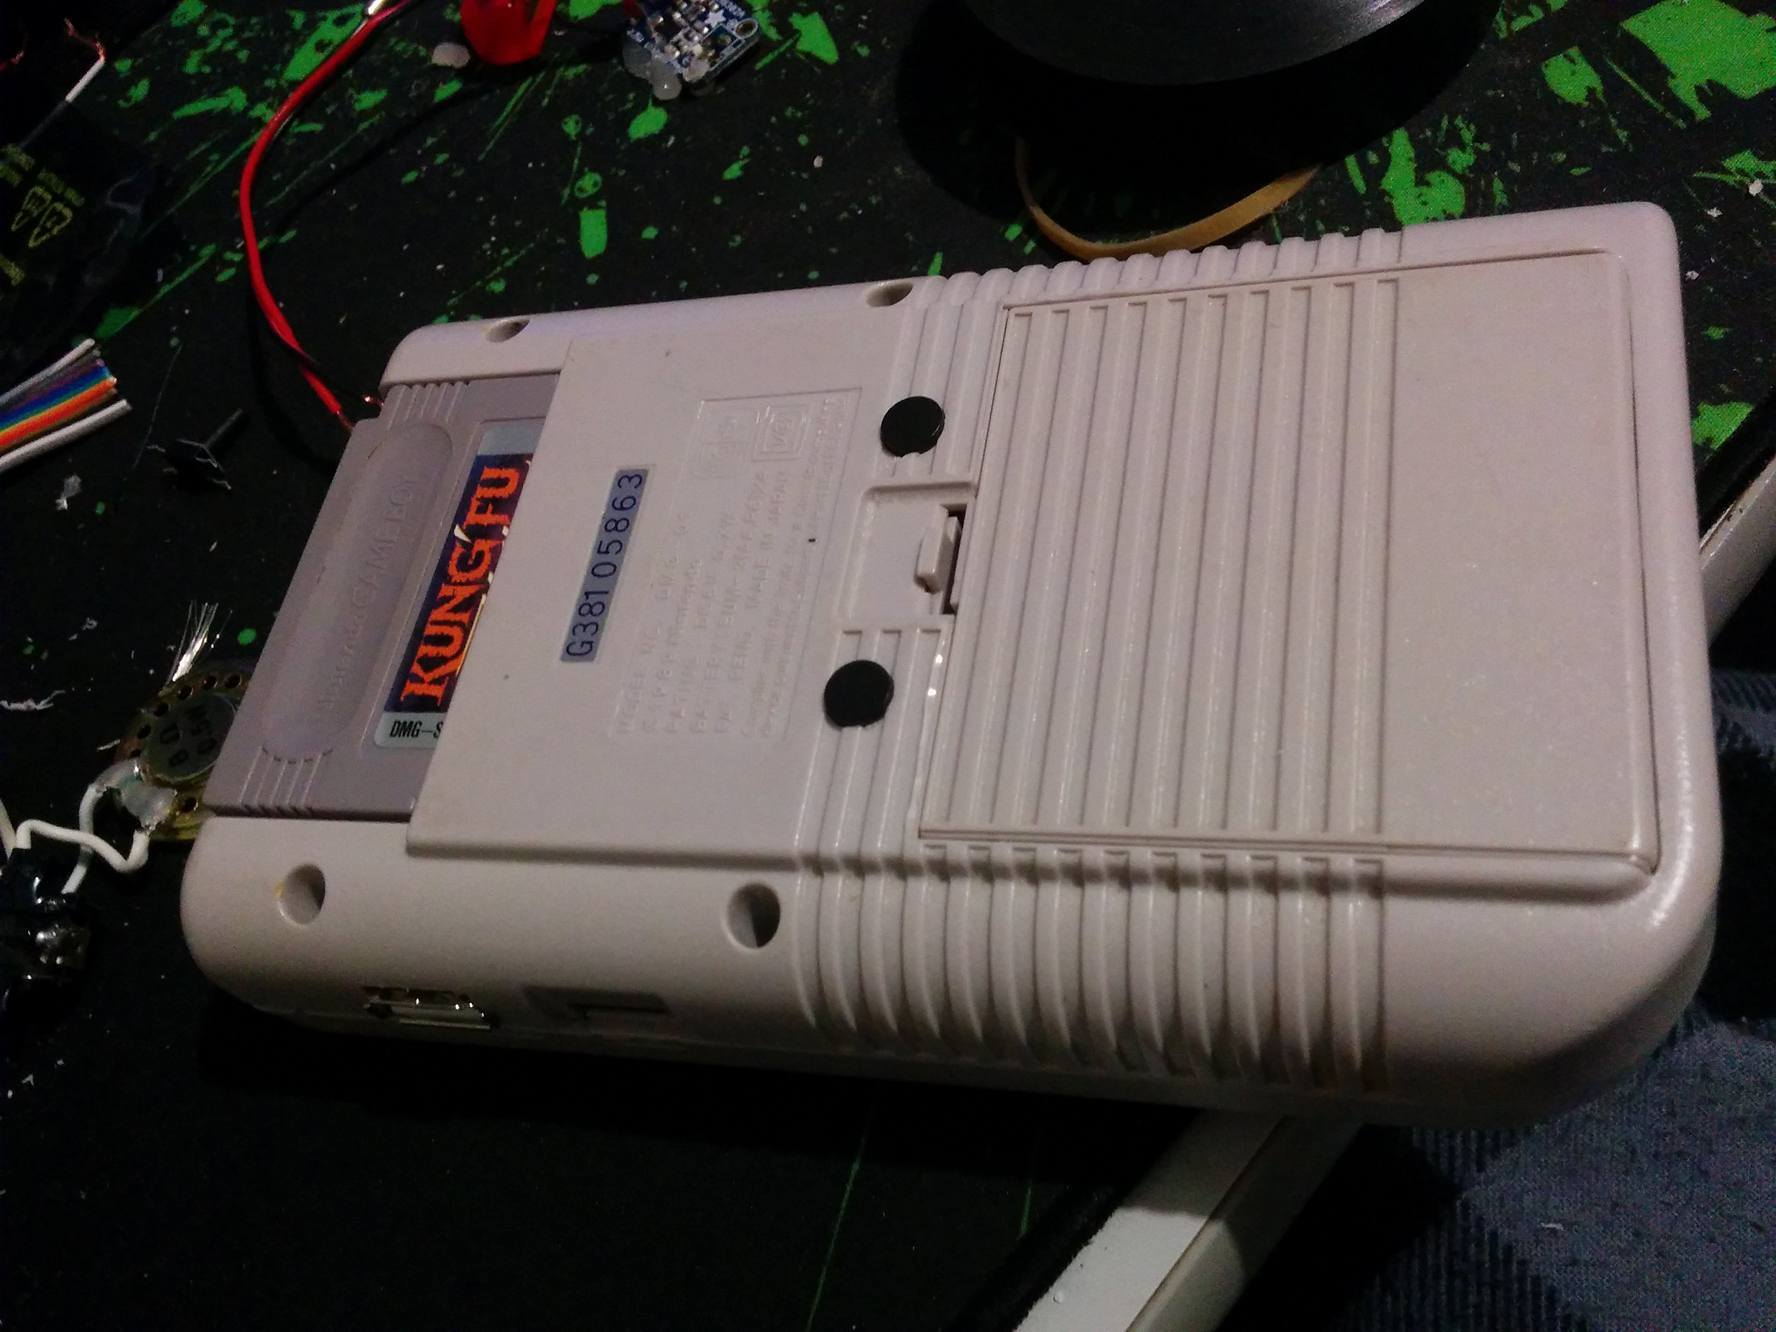
- 13555580_10157175071215201_1873036569_o.jpg (167.16 KiB) Viewed 13454 times
- 13555927_10157174820670201_632384204_o.jpg (83.33 KiB) Viewed 13454 times
I had to trim down the GB Cart reader, almost back to the pins for clearance:
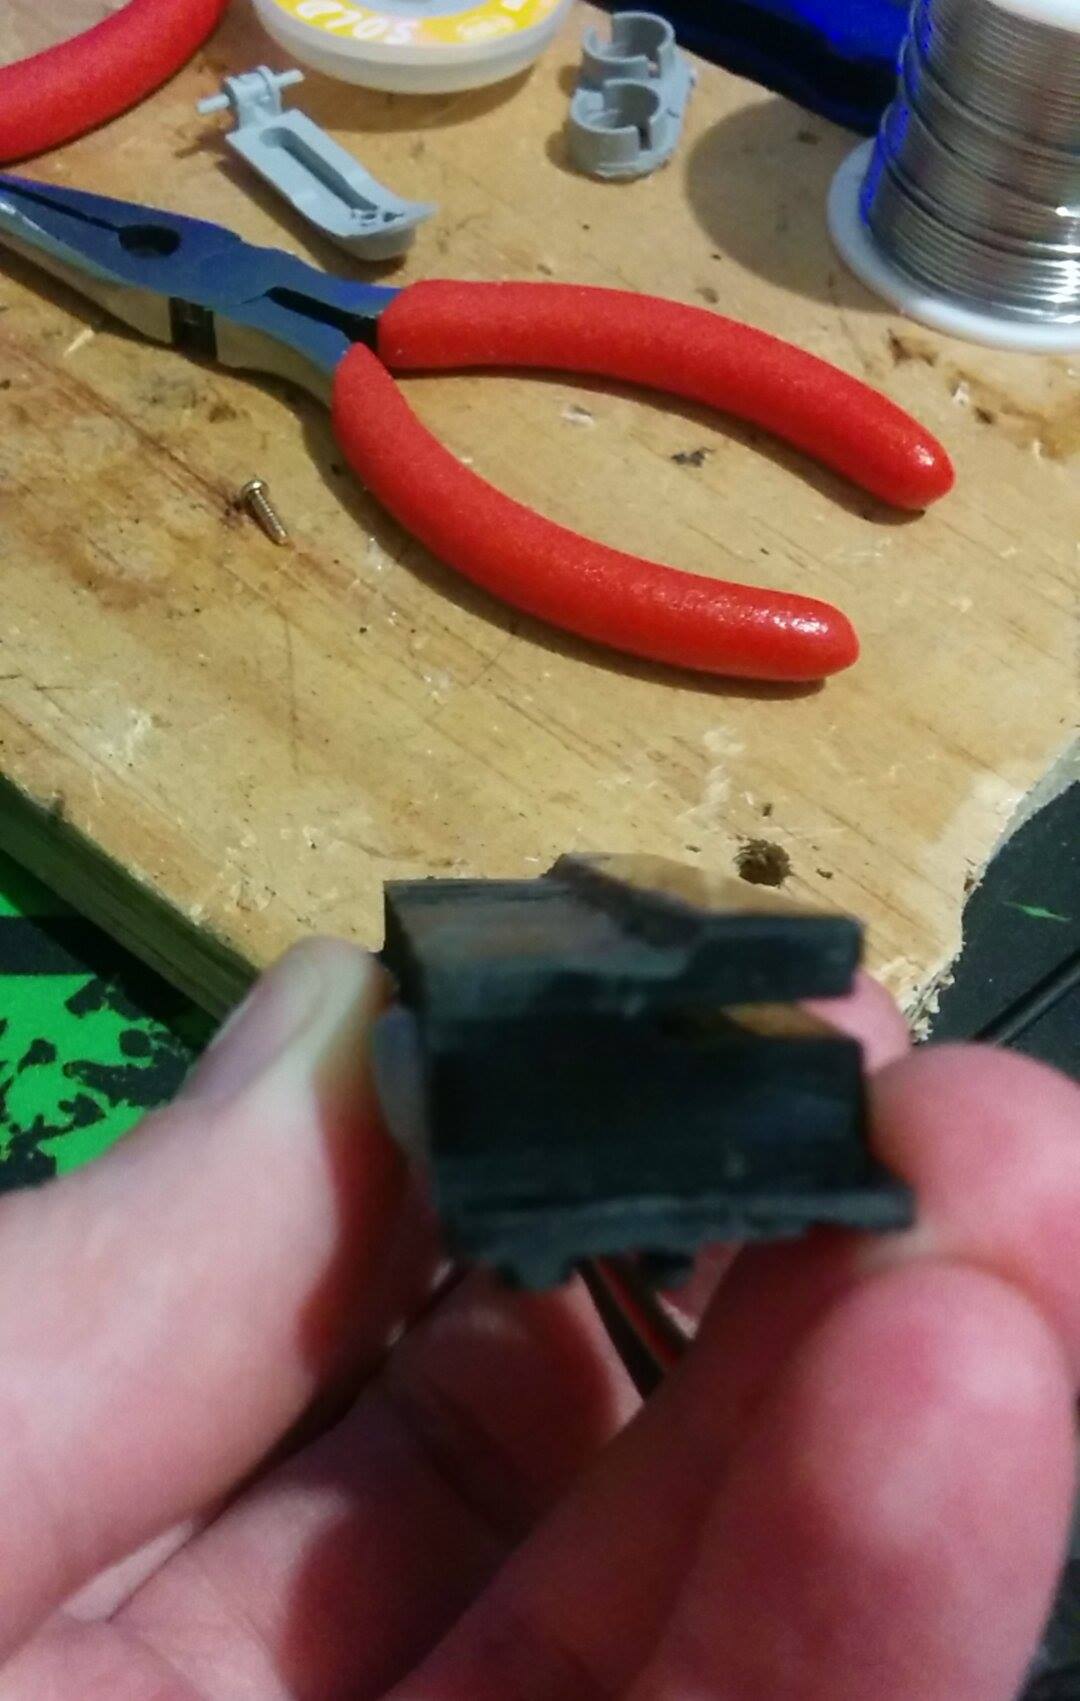
- 13569832_10157174842305201_1203281378_o.jpg (135.19 KiB) Viewed 13454 times
Helder PCB:
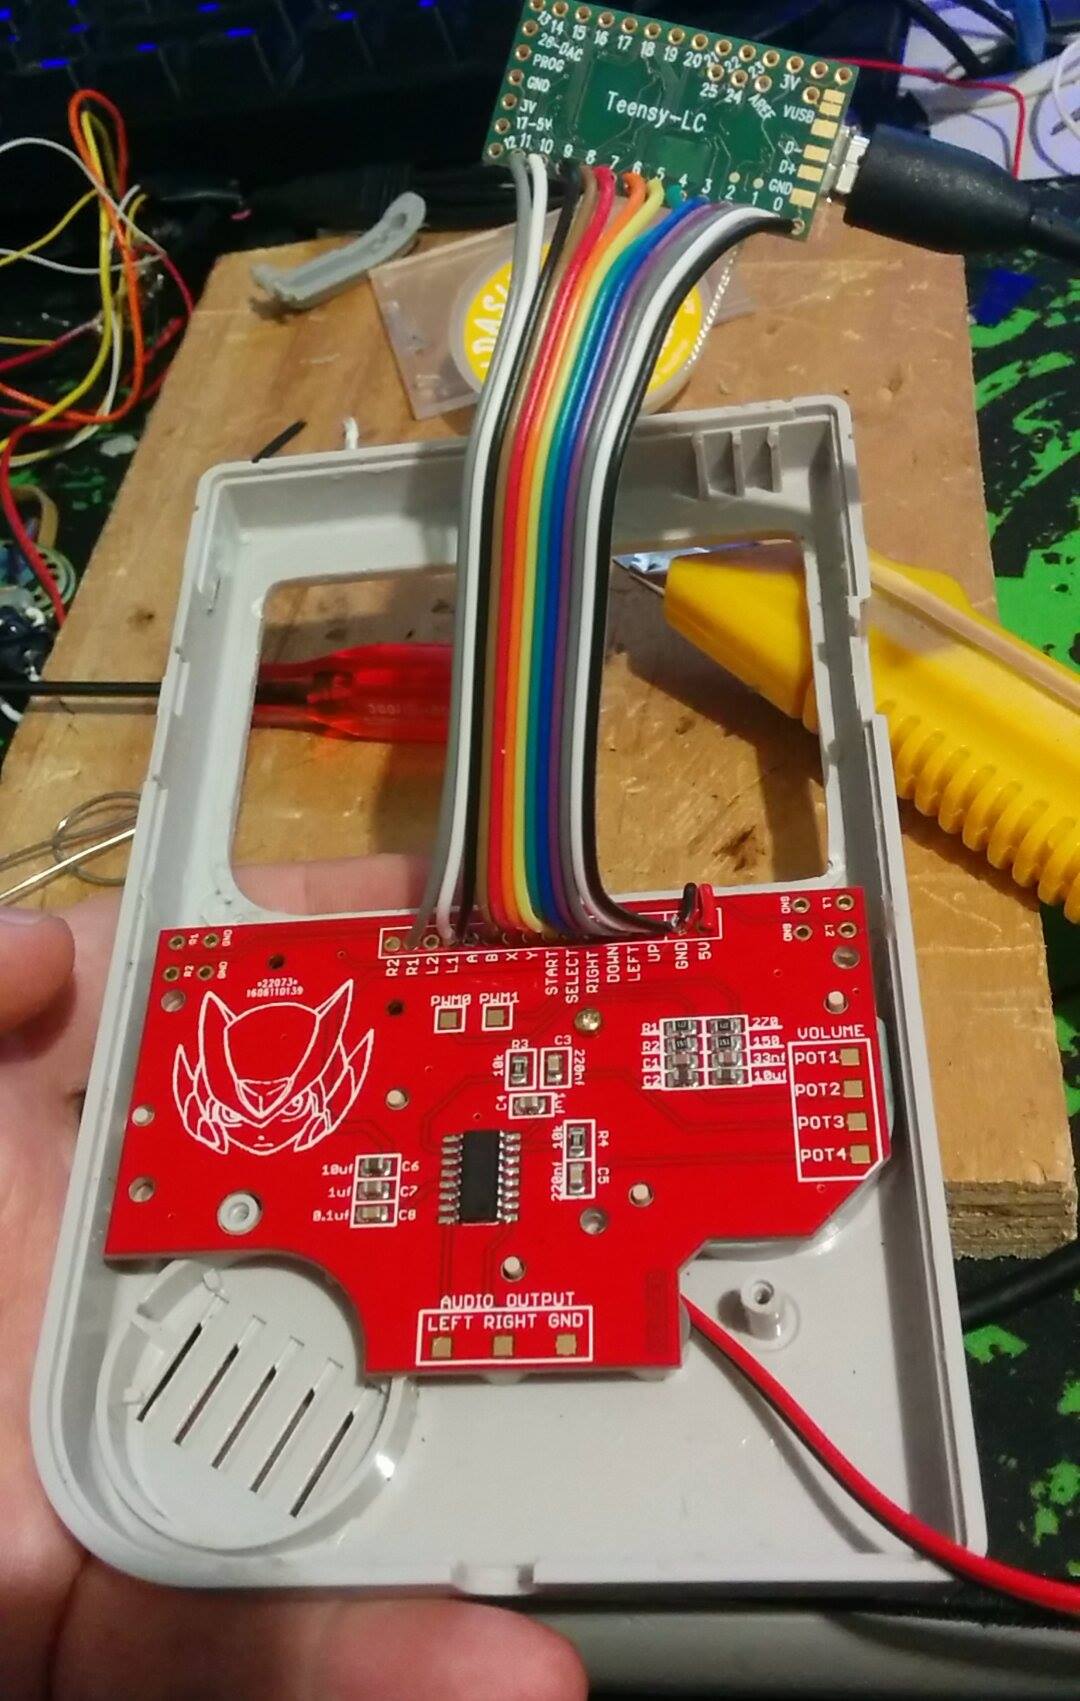
- 13575496_10157175398205201_866598347_o.jpg (201.41 KiB) Viewed 13454 times
Re: Hawker's RetroPie360 + Gameboy Zero
Posted: Sun Jul 03, 2016 7:42 am
by Maxxerd
Hi, your GB0 looks great already!
Quick question, I saw in another topic that you are using the XIANJIE 3.5" screen. Is this one working ok? No extra mods needed to get it to work?
I've emailed the seller for some info, hope to hear from them soon.
I'll be following your build!

Thanks, Max
Re: Hawker's RetroPie360 + Gameboy Zero
Posted: Sun Jul 03, 2016 7:54 am
by hawker180
Maxxerd wrote:Hi, your GB0 looks great already!
Quick question, I saw in another topic that you are using the XIANJIE 3.5" screen. Is this one working ok? No extra mods needed to get it to work?
Hey Maxxerd,
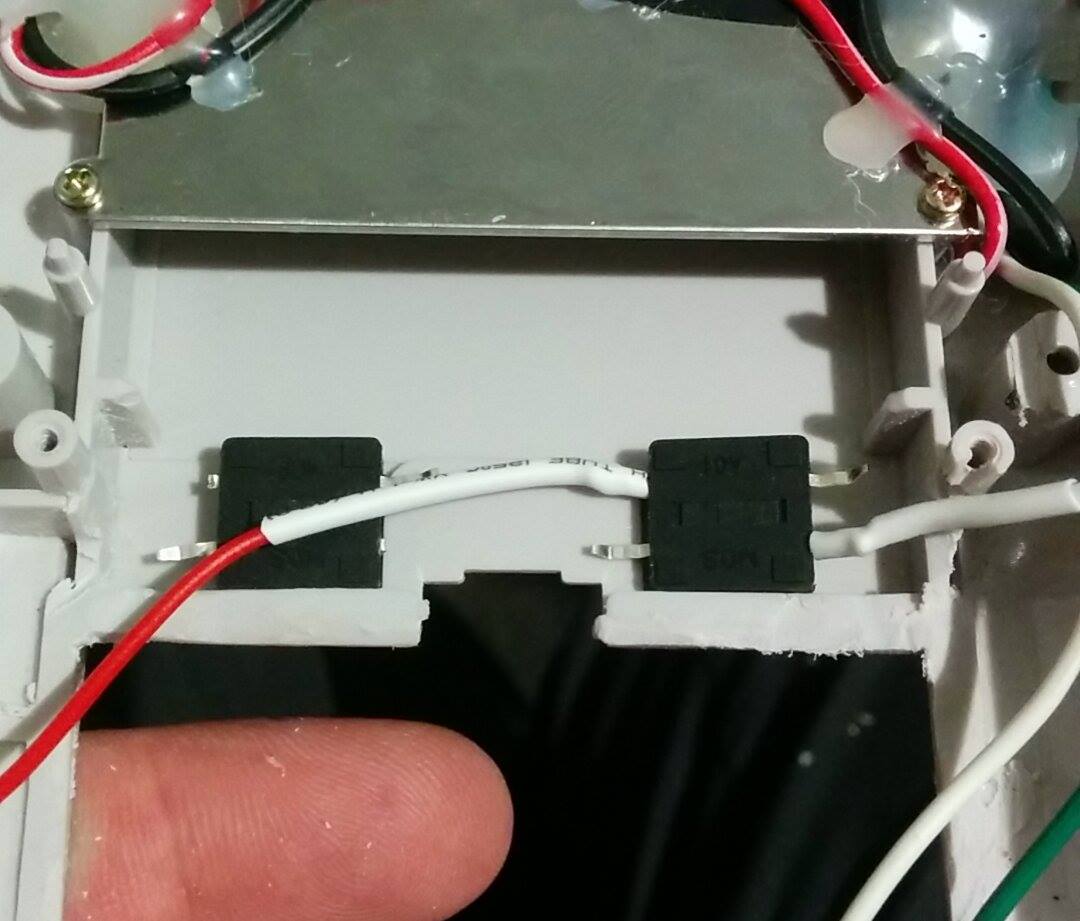
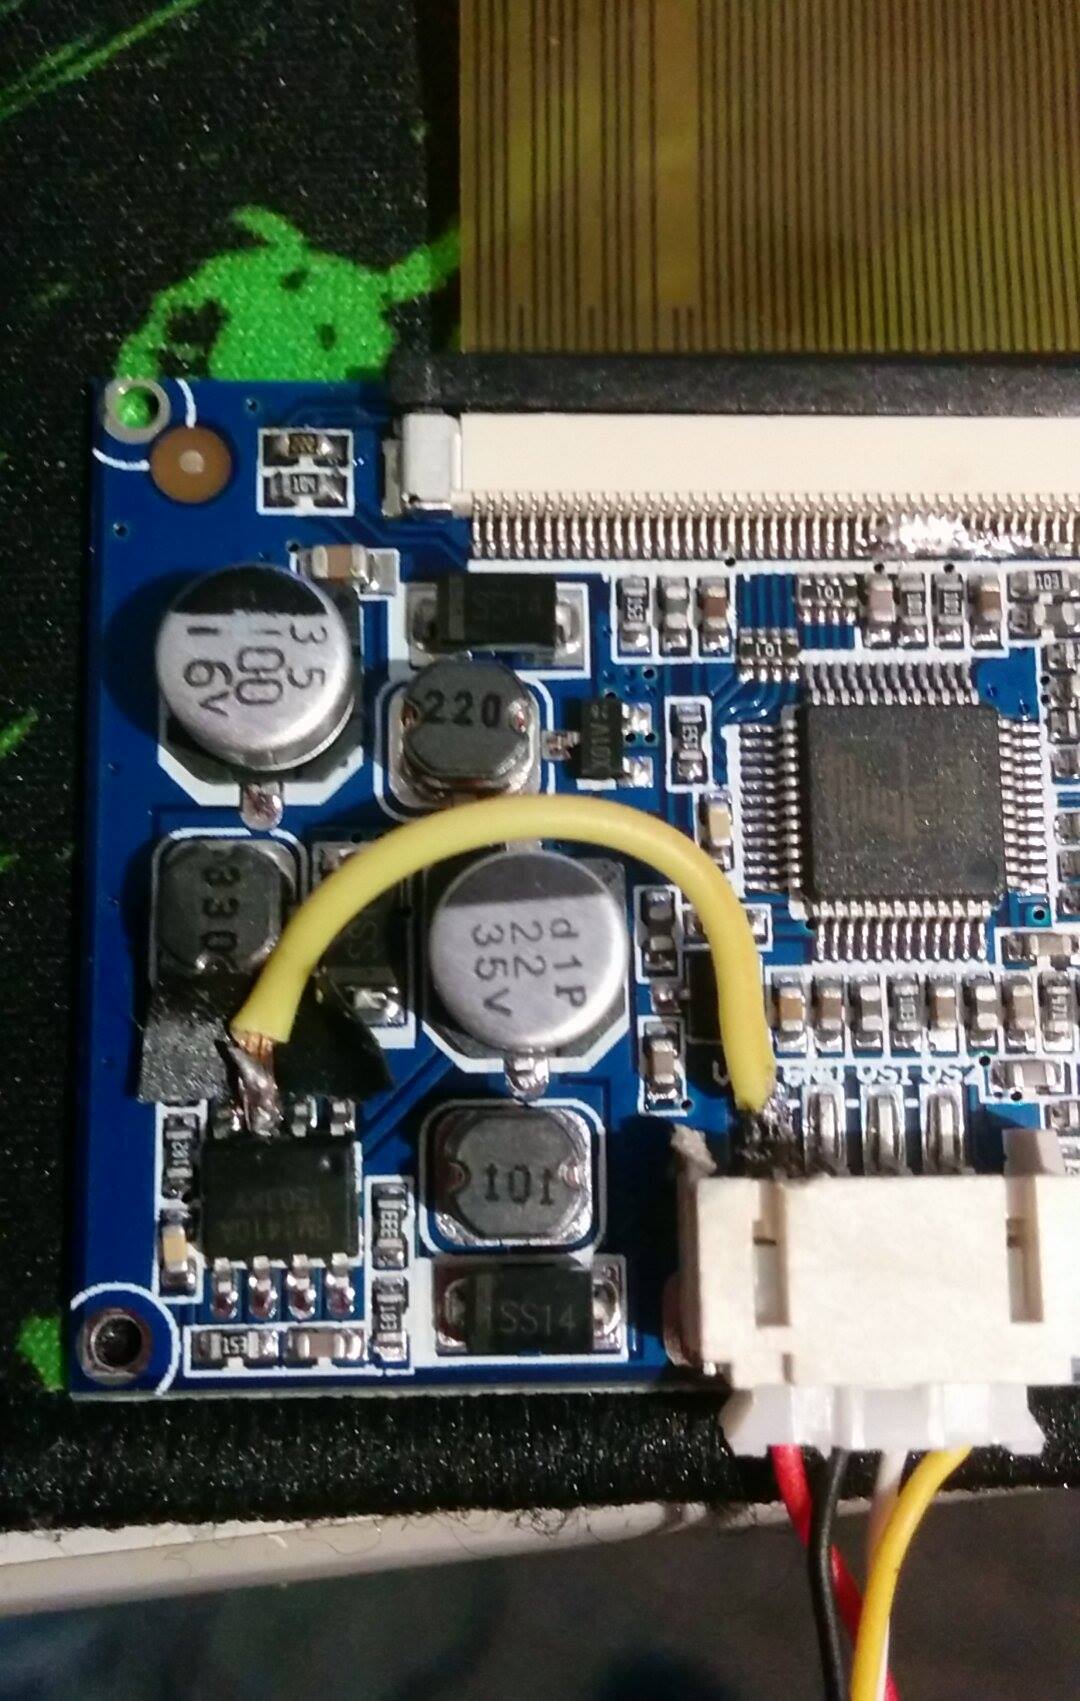
The screen is working off 5v, I had to solder the single wire as per below, My solder job isn't my best work but its working:
I did make a bad decision of fitting the screen before drilling my extra buttons and the drill grabbed the ribbon and damaged the back lit. Just waiting on another one to be delivered.
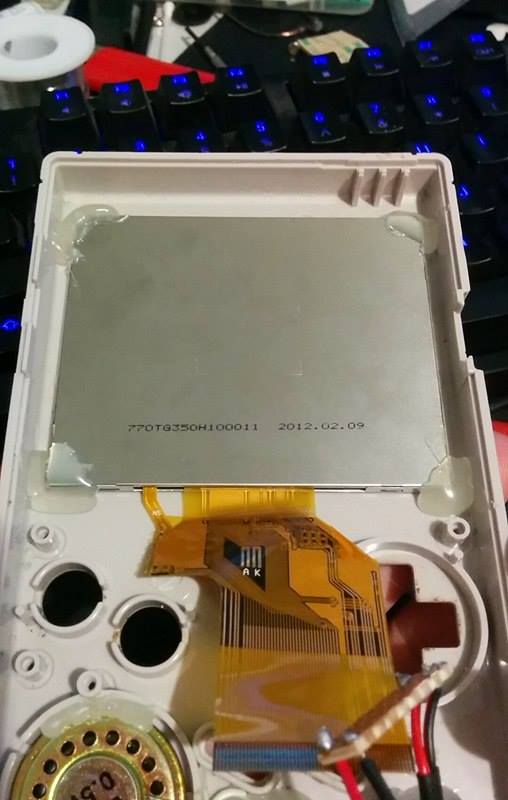
- 13523695_10157166258170201_710724527_o.jpg (220.41 KiB) Viewed 13432 times
See the 2 wire trace ribbon on the left, that is what I damaged, without it the screen has no back lit. Unfortunately I couldn't repair it. New screen should be here in the next few days.
- 13530363_10157166280575201_100429216_n.jpg (43.13 KiB) Viewed 13424 times
Here are some ebay links for the screen
Australian Seller:
http://www.ebay.com.au/itm/162080512374 ... EBIDX%3AIT
Chinese Selller:
http://www.ebay.com.au/itm/361517362869 ... EBIDX%3AIT
The screen seems very good quality, there is no contrast or settings to change on it but I am happy with the price and quality so far.